Watercolor gold paint powder can be used to mix your own watercolor paint. You can also use the powder as it is to create an amazing watercolor background for your painting.
In this step-by-step tutorial, you learn how to create a free-flowing golden watercolor wash. The gold powder also adds texture.
I show you how to watercolor the daisy as well. I used colored pencils to finish off the artwork.
You can download and trace the drawing of the daisy in One Tree Art Club and it’s free. Learn how to trace a drawing onto watercolor paper here.
Step 1.
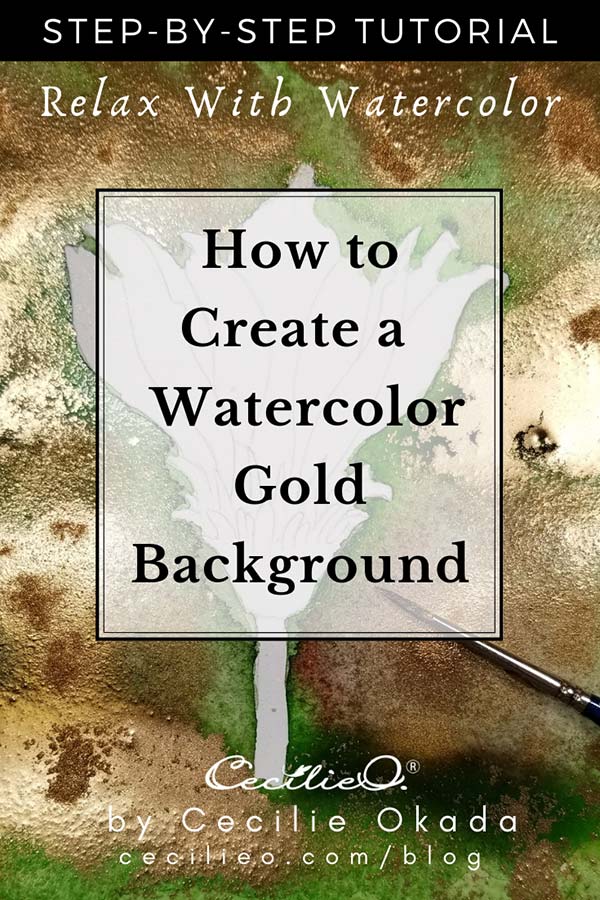
Paint the area surrounding the outline of the flower with loads of water. Make sure to keep the flower itself dry.
Use a big brush and paint with various shades of green. To create contrast, add black in the end. The water will make the colors flow into each other in interesting ways. Use your brush to move the colors. Not in a linear fashion, but rather dabbing the tip of the wet brush.


Step 2
While the paper is still soaking wet, take some gold powder in your hand and sprinkle. Avoid the flower itself. Spread the gold powder around with your brush.


Step 3
Use a watercolor sponge (or tissue paper) to soak up some of the gold in random places. This will create interesting shades

Now let’s paint the daisy itself, using the photo below as reference. I took it during an early morning stroll in a Tokyo park. It had just rained and the light was beautiful. (We’re not going to bother with the water drops!)

Step 4
Let it all dry. Then, paint the leafy part of the daisy with light and dark green.
You get warm shades of green by adding ochre, mustard or even a little pink color to various greens. You get the dark green by adding black.
The texture in the darker green is the result of a little bit of stray gold powder.

Step 5
When the green is all dry, paint the petals with warm yellow. You get warm yellow by mixing a tiny bit of red into the yellow. Paint the stem brown.

Step 6
Paint lines on the petals with a light green using the photo as your reference. Don’t try to be exact; make it your own flower.

Step 7
Paint with white gouache in selected places to imitate the light shining on the petals

Step 8
Draw outlines with a sepia-colored pencil. I also used yellow, ochre and green pencils to highlight the colors on the daisy ever so lightly.
The aim is to highlight, not to overpower the watercolors. Watch this maple leaf video tutorial to learn how to highlight watercolors with colored pencils.

Step 9
I’ve created a strong sepia outline as contour around the flower. This enhances the contrast between the delicate petals and the bold background. Lastly, I use a greasy white pencil to highlight the white areas I have painted with gouache.


All done. Have fun experimenting with gold paint powder!
Learn how to make your own watercolor gold paint for more delicate and decorative artwork in this tutorial.