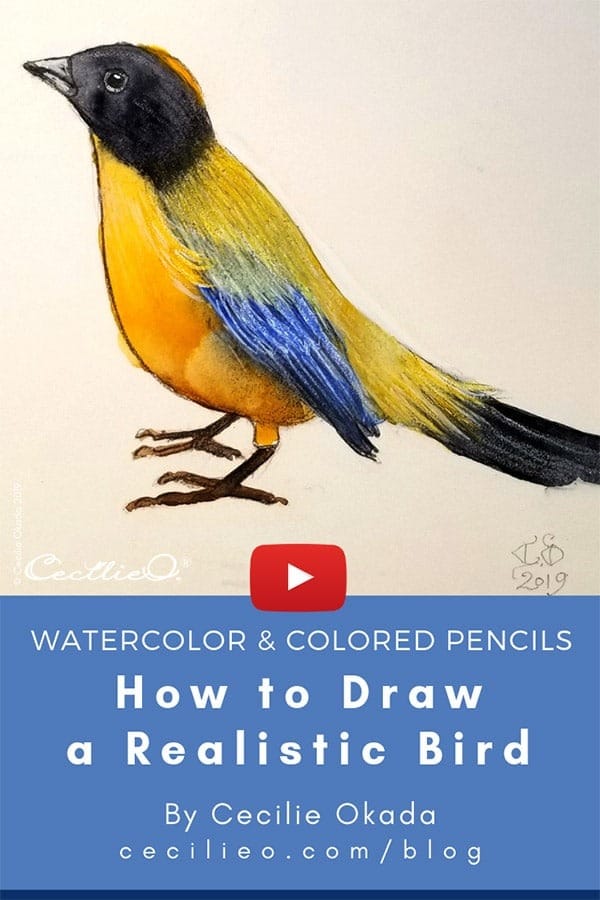
Contrary to what you may think, you don’t need to be very exact in order to create a realistic drawing of a bird. Drawing birds present one challenge in particular, namely how to make the feathers look real. It’s almost dizzying trying to capture the various layers of feathers, each layer presenting its own neat pattern. In this video tutorial, I show you an easy process for drawing realistic feathers, using three different tools: A watercolor base, white gouache, and colored pencils.
In the first part of the tutorial, I draw the bird with a pencil, not getting it right at the first attempt. Just like you. You can trace my drawing if you want to skip this step when you create your own artwork. Download a free PDF in the One Tree Art Club library; the PDF also has a reference photo and color swatches.
The watercolor base is painted with loose, free brush strokes, only focusing on capturing the basic colors of the bird. I then paint layers of white gouache using a very fine brush (size 0) to build the feathers, but not trying to copy the feathers blindly. Rather, I paint my impression of the feathers and then draw with colored pencils on top. In between, I use a hairdryer. It’s important that the paint is completely dry when you add colored pencils, otherwise, the colors won’t take hold.
In addition, I use a greasy white pencil that makes for strong marks, not faint white as you get with an ordinary colored pencil. The greasy white pencil will also work better if the paper is a little bit warm, melting like butter and leaving even stronger traces of white.
These are the tools I use, available in any artists’ supply store:
- Daler Rowney orWinsor & Newton watercolors.
- Permanent White Holbein Artists’ Gouache
- Various colored pencils by Faber Castell and Derwent Most stores sell single pencils, so you can select your own range of colors.
- White pencil by Stabilo. A cheaper version is available from Rembrandt
- Paper: Arches hot pressed, smooth 100% cotton white watercolor paper
- Medium size brush for the mushrooms, thick brush for the ground. You can buy single brushes or in sets. I use a variety of brushes, what’s important is that it is good quality and the tip stays pointed after use.
- Sponge for soaking up excess water.
- Watercolor tape
- A smooth piece of wood or custom wood to mount the paper.
When you paint with watercolor, you need to tape the paper onto a plate of wood with watercolor tape. This is because the paper buckles from the water and the tape hold it down flat when it dries. Here, I show you How to mount watercolor paper in a step-by-step tutorial.
However, since this illustration is not very wet, you can just tape the paper on the board without wetting and stretching first. In this case, the paper won’t buckle.

Please ask me any questions in the comments section under the tutorial on YouTube, and I would love to see some of your creations too.
Happy drawing and painting to you!


