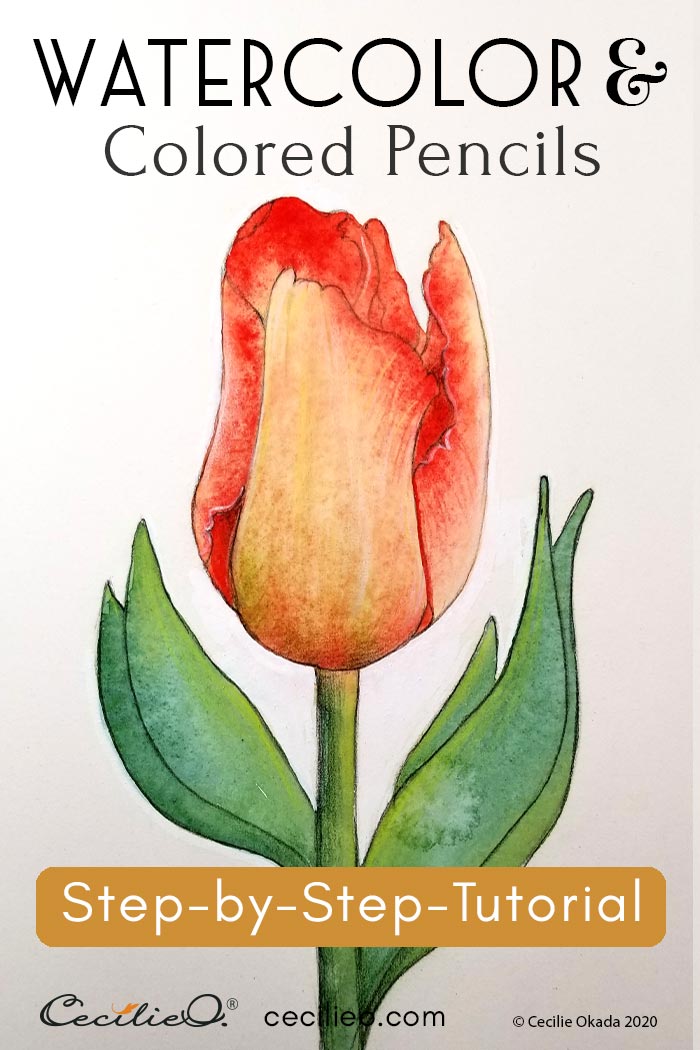
The tube-like shape of the tulip makes it an easy flower to watercolor. There are no intricate petals to confuse your eyes. If you add a little bit of colored pencil to your watercolor, you can make a smashing flower with very simple means. I will show you how in this step-by-step tutorial.
I took the photo of the blushing, red tulip this spring. Ever since I saw the photo on-screen, my hand has been aching to paint it. The elegant shape and subtle gradients on the petals make it perfect for a tutorial. You can use watercolor together with colored pencils for a terrific result. It’s much easier than intricate watercolor techniques.

The meaning of red tulips
Red tulips stand for true love, and tulip legends are filled with stories of impossible love. But for the artist, the love affair with this beautiful flower is saturated with joy.
Did you know that the world tulip comes from the Persian word turban? That’s because it’s a turban look-alike. (Sort of, wouldn’t you say?). Persian art and design are awash in amazing variations on the tulip. Take a look at my Pinterest board (scroll down for lots of tulips): Persian, Mughal, and Indian Art. I find the delicate beauty of this type of design mesmerizing.
The tutorial
If you want to watercolor but not bother with drawing the tulip outline, I’ve made it easy for you. Download my drawing for free in One Tree Art Club. Print it out. Learn how to trace a pencil drawing onto watercolor paper.
Now to the creative fun.
Step 1: Sorting out your colors first
It’s tempting to just grab your brush and figure out the colors as you go. If you’re like most of us, you will gravitate towards the colors you always use. Because that’s the easy way.
Struggling with colors is the most common frustration when a painting goes wrong. Better get it right in the first place. It’s difficult to rectify watercolors.
If you want to make beautiful watercolors, you need to dive deep into color mixing. You need to look closely at your subject, study shades of color, and practice how to mix the colors that you see.

The red color of this tulip is simple enough. Most watercolor pallets have a crimson red option.
When you examine the petals, you will see shades of light green and ochre. If you add ochre on top of a red wash, it will be too dark to produce the color you see in the photo. The edge of the petals is a light shade of pale, warm yellow.
As a result of these observations, you need to mix a moon-yellow color. Take lemon yellow, add a tiny dash of red and a good dose of white. You will have the pale moon-yellow.
The second color you need for the petals is a light green-ochre mix.
The stem and leaves call for a dark bluish-green and a somewhat pastel green shade. Add white to a green and ochre mix to create the pastel hue.
Step 2: Painting the watercolor base
To lay the foundation for a free and fluid painting of the tulip, paint the flower head with water first. Then paint with crimson red, spreading the pigments roughly as you see in the photo. Don’t try to be exact, let the color flow.

When the red is half-dry, add small amounts of the moon-yellow and bright green. When it’s getting dryer, use a small brush to gently draw stripes as you see on the petals. Draw from the edge of the petals and inward.

On the stem and leaves, first paint with the blue-green, leaving parts with little pigments. Here you add the lighter green.
Step 3: Retouching with colored pencils
You can do the touch-up with a limited selection of colored pencils. Whatever colored pencils you have will do. Select those that are closest to the photo.
The shading with colored pencils should be done ever so lightly. Keep in mind that your task is to retouch the watercolor, not to draw a picture with colored pencils.
In my case, I have a large collection of colored pencils that I have assembled over the years. I use the watercolor & colored pencils technique for most of my illustrations. Whenever I’m in an art supply store, I hunt for colors that I don’t have. I don’t stick to a particular brand; it’s the color variations I’m after.

Down the track, you may want to get a set of colored pencils with a wide selection of colors. That is if you want to continue to experiment with watercolor & colored pencils.
I used Pale Vermillion, Pale Geranium Lake, and Deep Red to touch up the red parts. For the light parts of the petals, I used Primrose Yellow. Earth Green Yellowish for the green part, and white, aquarelle colored pencil for highlights.

Look at the photo for shadows. To add volume with shading, I used a Sepia (dark brown) colored pencil. You can also redraw the outline with Sepia. To enhance the lines on the petals, draw lines with Deep Red.

For the stem and leaves, I used Juniper Green and bright Lime.
I painted over all the stray watercolor outside the outline with white gouache. This gives the watercolor a neat look, but it is by no means necessary. In many cases, the bleeding of color makes the artwork more beautiful. Accidents make art.
Experiment and let your soul shine through
And lastly: Don’t try to create a photographic piece of art. Photographic art is impressive, but it can be pretty boring too. Paint and draw with abandon. Use a photo for reference, but don’t try to copy blindly. Do something that’s not in the photo. Experiment. Let your soul shine through the work of your hand.


