

Estimated reading time: 7 minutes
What if an unusual flower is all you need to draw and paint an easy mandala? Nature abounds in beautiful, breathtaking patterns and forms.
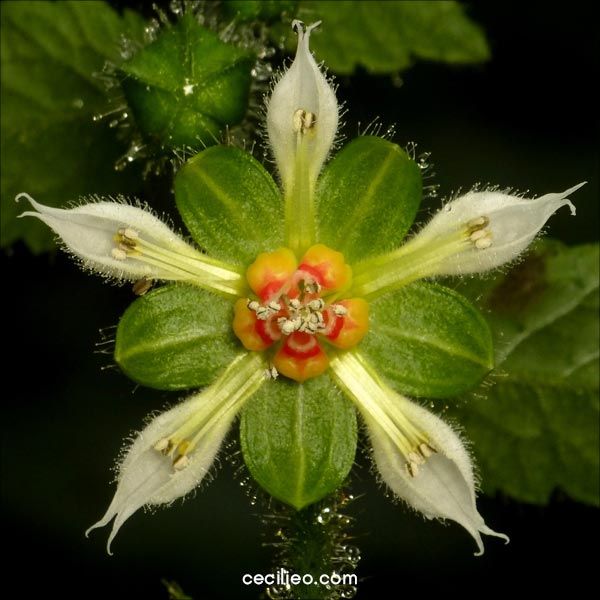
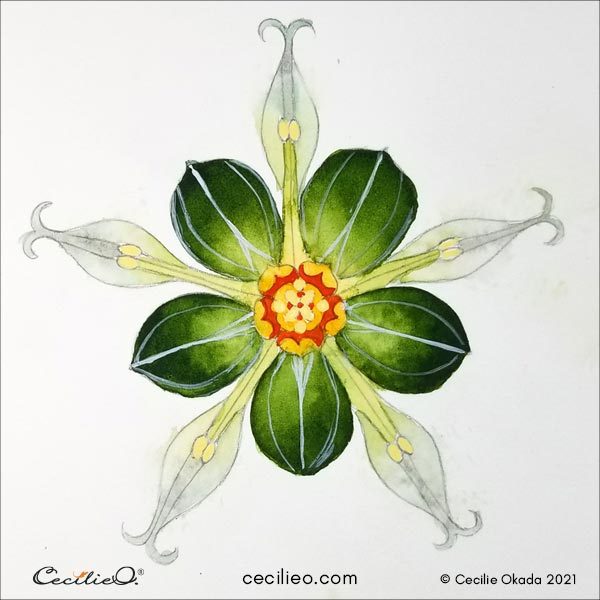
The mandala in this tutorial has no intricate, multi-layered patterns. The reference photo of the flower is a mandala. The exceptional arrangement of petals, leaves, and stamen makes it so. Let your creativity loose as you follow the steps to watercolor this flower. It’s a fun and relaxing process.
I could not find much information about the Nasa Triphylla flower on the internet. It is native to Central and South America and belongs to a striking family called Loasaceae.
Step1: Assessing the flower in the reference photo
In the “headshot” of the flower, we see how the elements distribute in a geometric pattern. It reminds me of sacred geometry, a fascinating subject. Artists and designers have copied geometric patterns in nature for thousands of years.
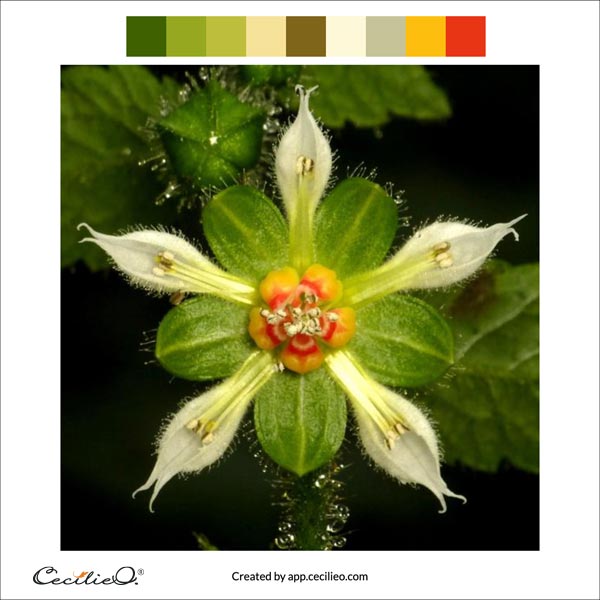
Since we will make a watercolor painting, let us take a snapshot of the colors in the photo first. I used our manual color palette generator for artists to pick up the dominant colors.
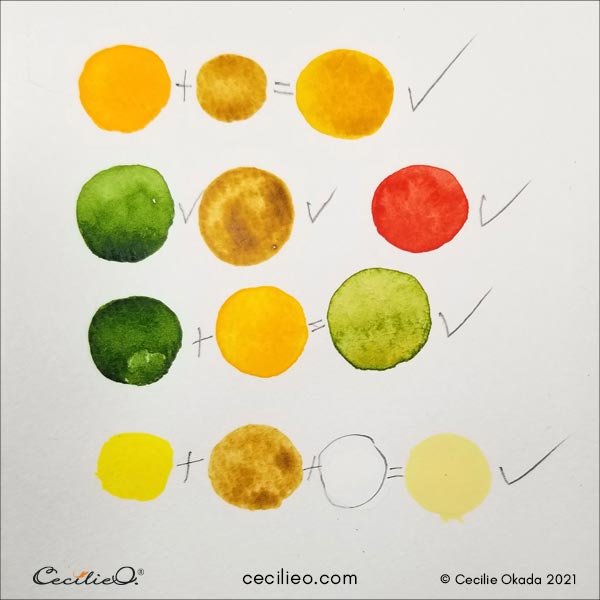
It’s a good idea to mix your colors in advance. That way you can focus on the creative process instead of struggling to get the right shades.
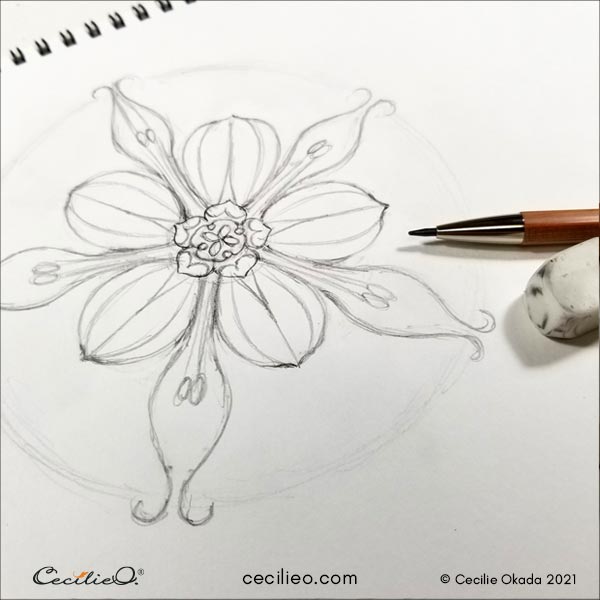
Step 2: Drawing an easy mandala
Start by drawing circles with distances that approximate how the flower is constructed. If you want to skip drawing, you can download my drawing for free (members: please check your newsletter for access) to trace it and transfer it.
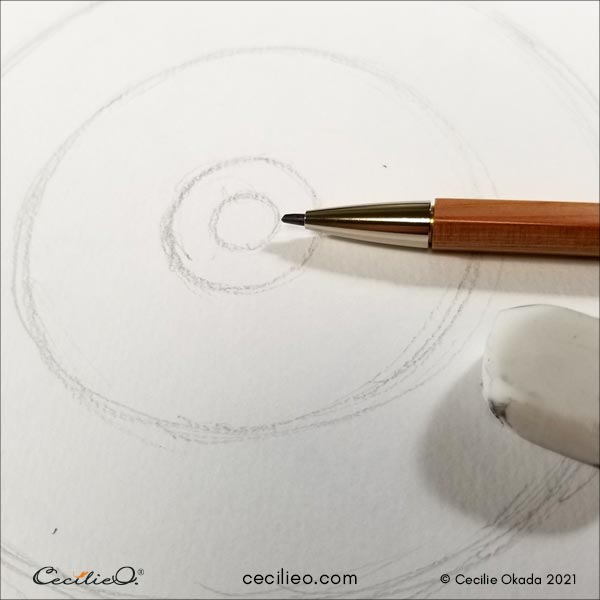
After some back and forth, I landed on a stylized version of the flower. Since my goal was to paint a mandala, I made no attempt to draw realistically.
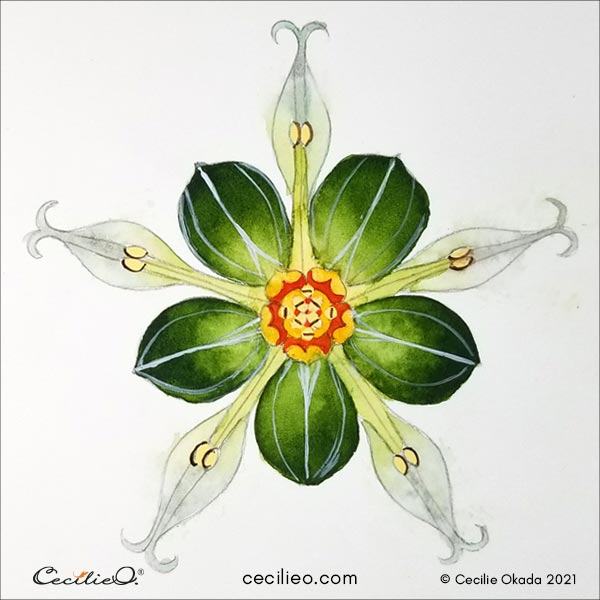
Step 3: Painting leaves and petals with watercolor
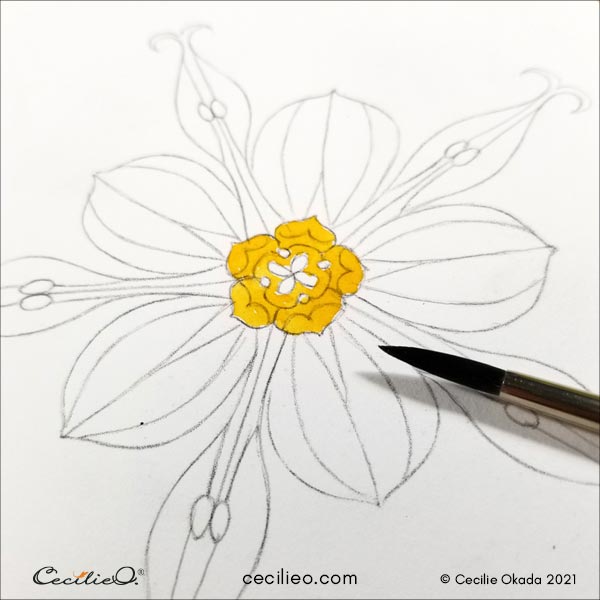
Painting red on top of yellow is no problem, so you can start by painting most of the center yellow.
The green leaves are the most prominent feature. To create gradients, paint them solid green first. In the inner part of the leaves, paint with ochre yellow. Push the brush strokes outwards to make the inner part lighter.
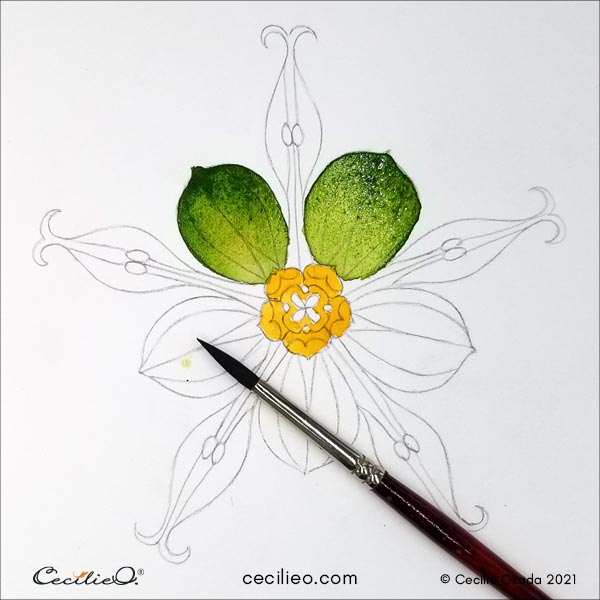
In the photo below, the leaves are now dry. I wanted all five to have as much contrast as the one on the right.
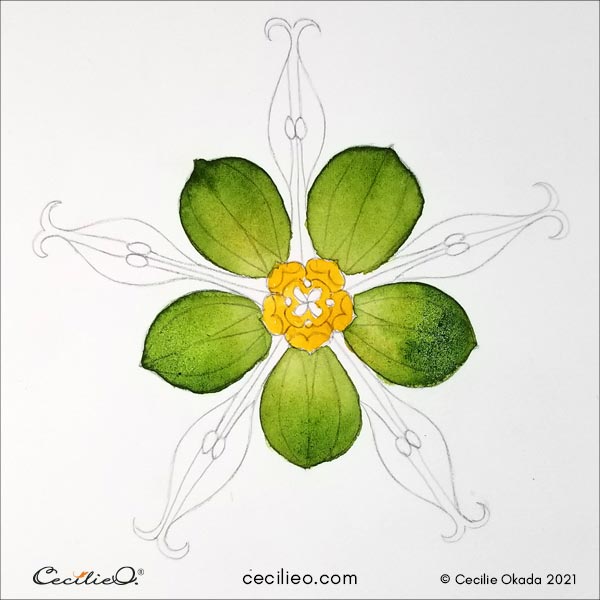
To achieve a stronger contrast, paint over with plenty of green pigment, but less water. Use a watercolor sponge to soak up paint on the inner part of the leaves. Paint the stamen in light yellowish-green while you’re at it.
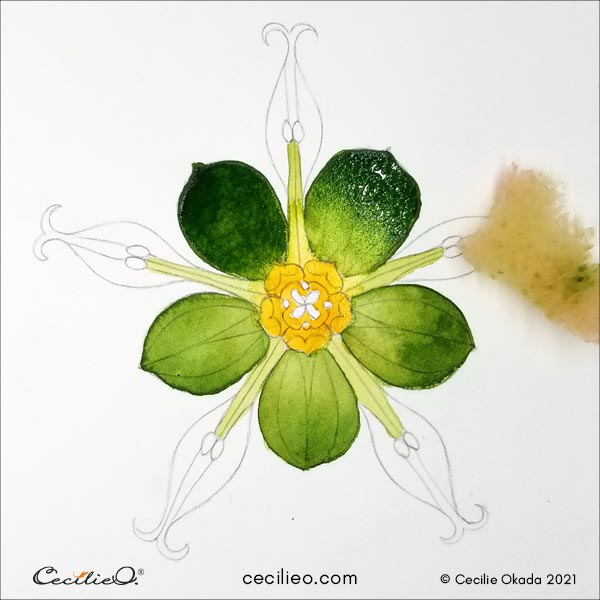
Now that the leaves are dry, it’s time to watercolor the petals (yes, they don’t look like petals). They are greyish. I used a sponge to get the right tint. Take note that there is a darker tint in the centerline going down the petals.
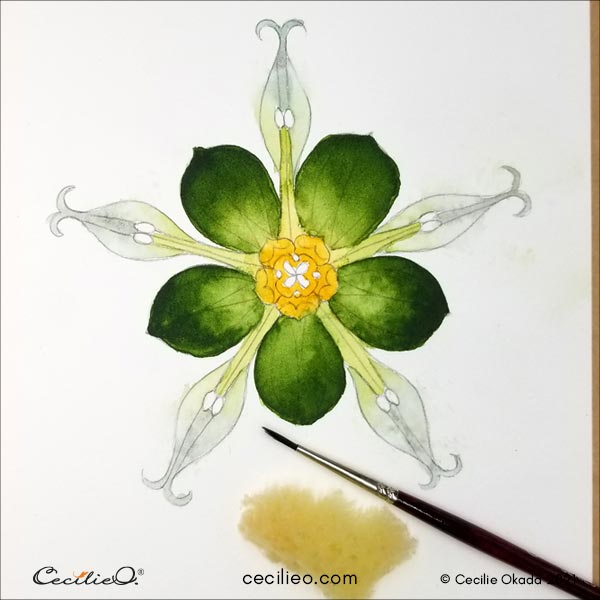
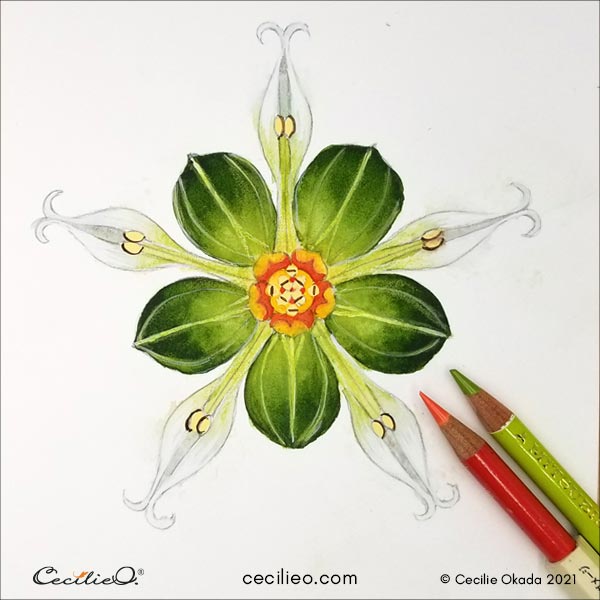
Step 4: Painting details with watercolor
First, draw the lines with white gouache.
Second, paint the various small circles and ovals with a pale yellow.
Third, paint part of the center red.
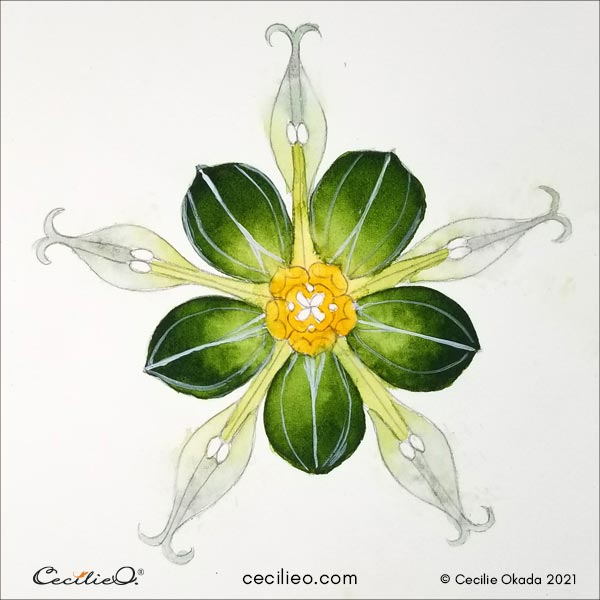
In the next step, I painted tiny brown stripes taking cues from the photo. Later on, I painted it over with white gouache because I didn’t like it. But only in the center; the brown lines around the stamens stayed.

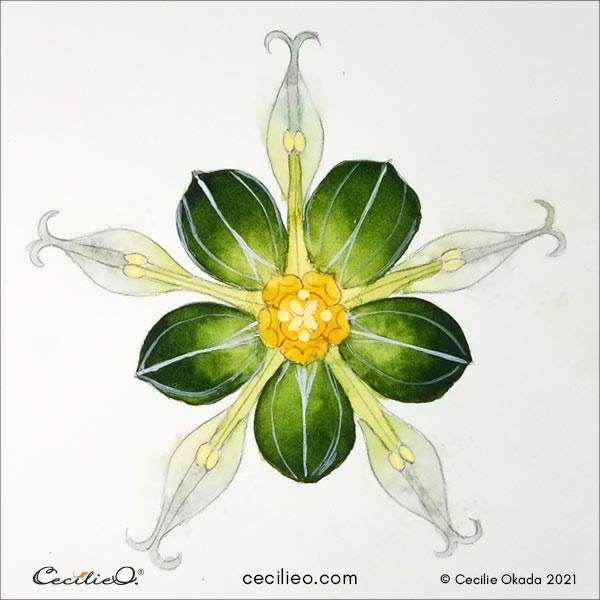
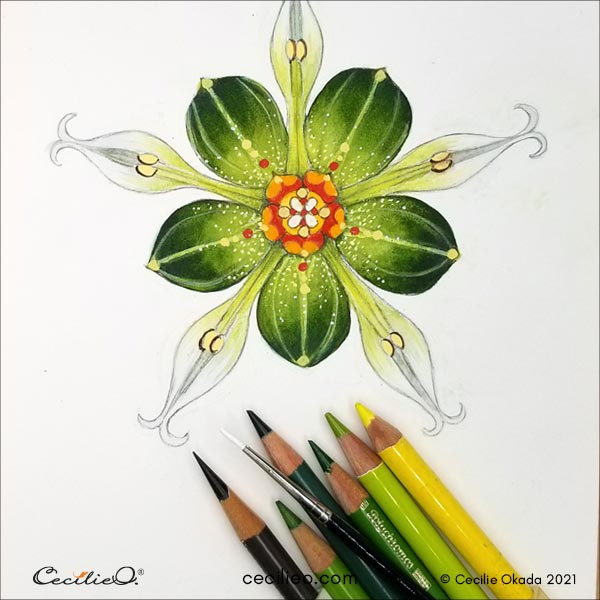
Step 5: Adding more details with colored pencils
With a light green colored pencil, draw over the white lines. To soften the red in the center I used colored pencil, but it didn’t work that well.
Instead, I painted the center once again with red and a stronger yellow.
I felt that the red color needed to echo somewhere else in the painting. That is how I started to play with dots. But first, I used various colored pencils to strengthen highlights and shadows.
Step 6: Completing the flower mandala
The finished painting surprised me. The look of light emanating from the center just happened. In yoga meditation, each chakra has a geometric form and its own mandala. When I look at this flower mandala, it feels like a heart chakra. Well, that’s my feeling. What do you think?

If you wonder about the art materials you need for this tutorial, my Guide to Art Supplies should be helpful.
Happy painting!
Here are some more watercolor tutorials (out of many):


