

Estimated reading time: 6 minutes
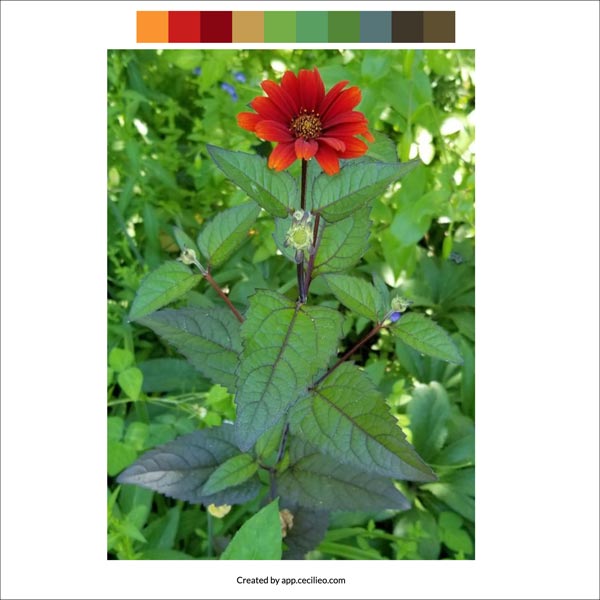
The red Mexican sunflower is an unassuming little flower. I spotted it in a lush garden up in Hokkaido. The beautiful arrangement of abundant leaves inspired this easy watercolor art project. Our focus will be on the whole plant.
I had no idea that sunflowers held great importance in ancient Mexico. It decorated the shields of warriors and was used as food, medicine, and a sacred symbol. And, of course, as ornamental flowers. There is evidence that the ancient Mexicans grew sunflowers as far back as 4600 years ago.
I didn’t know that there are red sunflowers either. Well, here it is. Let’s get started with the tutorial.

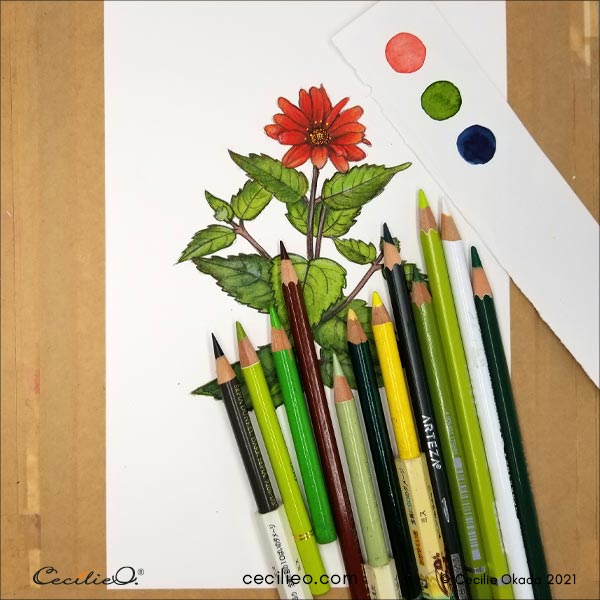
Step 1 & 2: Color palette and drawing the outline
I picked up the colors with our free artist tool for creating a manual color palette from an image. To make things simple, we are going to watercolor with only a few basic colors.
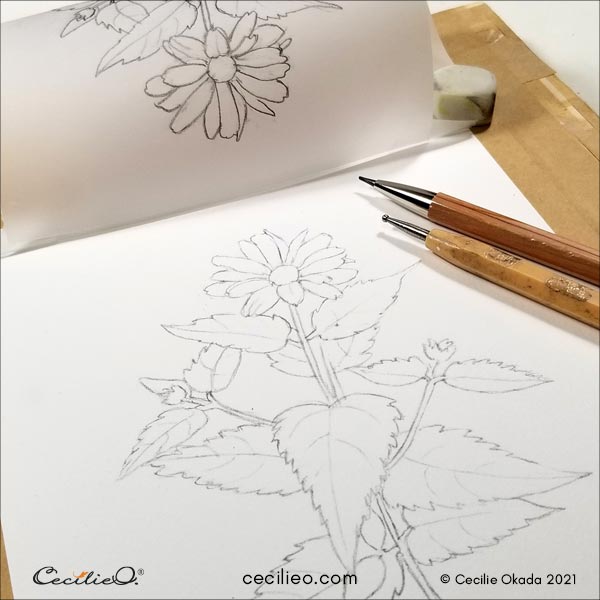
Drawing the flower head is straightforward. The leaves are layered and a bit more complex. In my book “How to Draw Flowers Step by Step. 46 Easy designs.” you can learn how to draw simple flower shapes with various leaf formations. The flower in this tutorial is well-suited for practicing the system I teach in the book.

You can also adapt the use of watercolor & colored pencils in this tutorial for the flowers in the book. Each drawing exercise can become an easy watercolor art project.
After my rough sketch, I drew over it with clean lines and transferred it to watercolor paper. If you rather use my drawing, you can download it for free from the One Tree Art Club Library. (Members: check your newsletter for details).
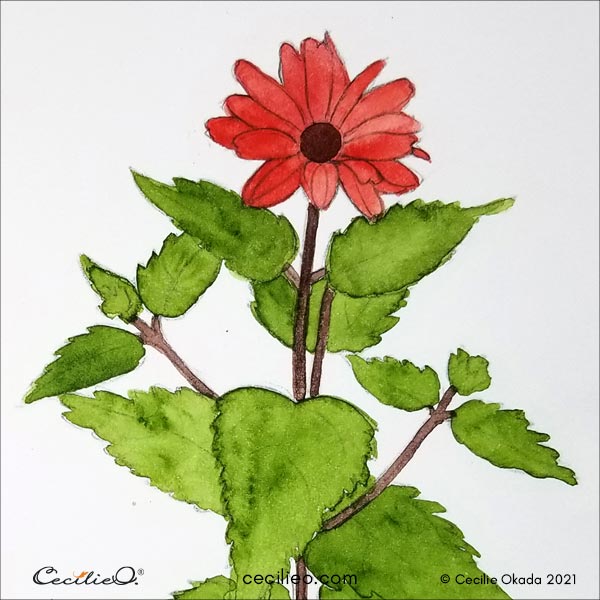
Step 3: Painting flat watercolor in red, brown, and green
Use a pointed brush and paint the flower head red. Whatever red is on offer in your watercolor set is ok. Your brush should be moderately wet.

When the red watercolor is dry, paint the center of the flower and all the stems brown. Use less water. When you are painting small details like these, you will have better control with less water.

Paint all the leaves green. Use your favorite green. It does not have to be like mine or the green in the reference photo. You can use a bit more water for the leaves. The water will create variations in the color that will look nice.

Step 4: Drawing and painting details in the red flower head
First, outline the flowerhead with a dark brown pencil. Make sure it is sharp so that the line remains thin.
The flowerhead has a shadow in the center and light color at the tips. Use a dark red or brown colored pencil to draw the shadow. At the tips of the petals, draw with a yellow colored pencil.

To paint the little dots that are the stamen, mix a bit of yellow watercolor with white gouache. The gouache is opaque and an excellent choice when you need to overlay color. Use your smallest brush with a good, pointed tip for the dots.


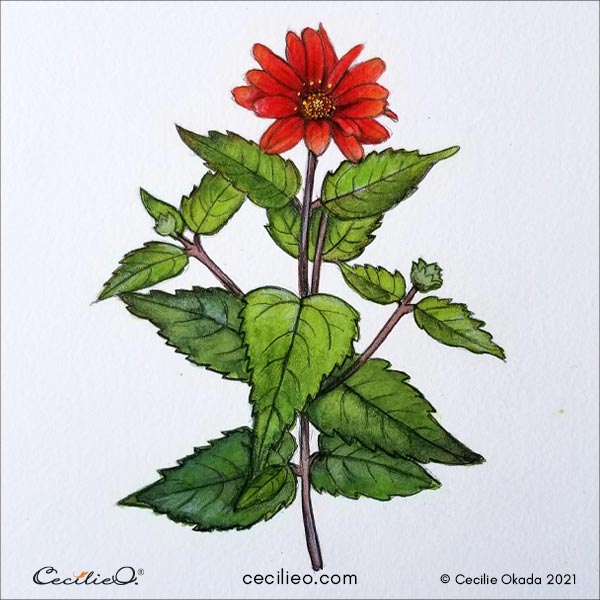
Step 5: Drawing and painting the details of the leaves
Outline the leaves as you did for the flower head. Also, draw the veins in the leaves. At this stage, I added a lighter tint of yellow to the end of the petals. The aim is to create a sense of 3D, and the lighter yellow made the perspective more realistic.
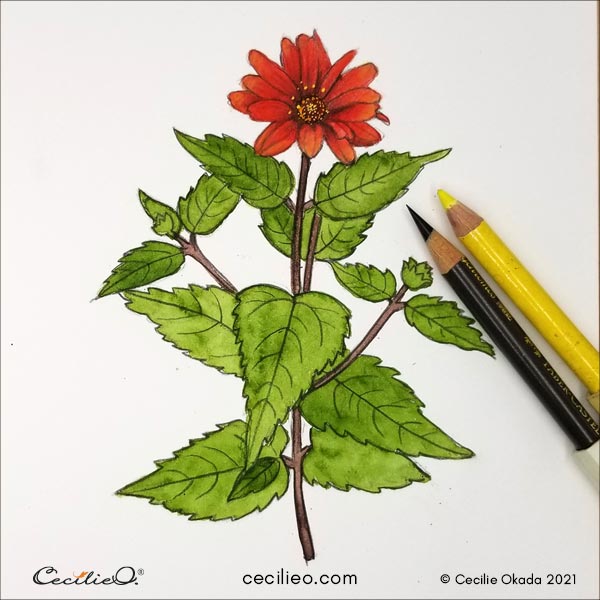
When you go about the details of the leaves, consider light and shadow. When you take a closer look, you see that the two top leaves are half light and half dark. That creates a 3D effect.
The bottom leaves are darker. I painted with indigo blue on parts of the leaves to create more shadows. For highlights, I used light green and even white colored pencils. Play around with your colored pencils. But be careful that the watercolor is dry before you start to draw.
I love the smooth sensation of colored pencils on top of dry watercolor. Test and see what happens. Use your eraser if it does not work. Watercolor sticks but pencil marks can be erased. Don’t be fussy. Have fun!
For a list of art materials required for this tutorial, go to my Art Supply Guide.


