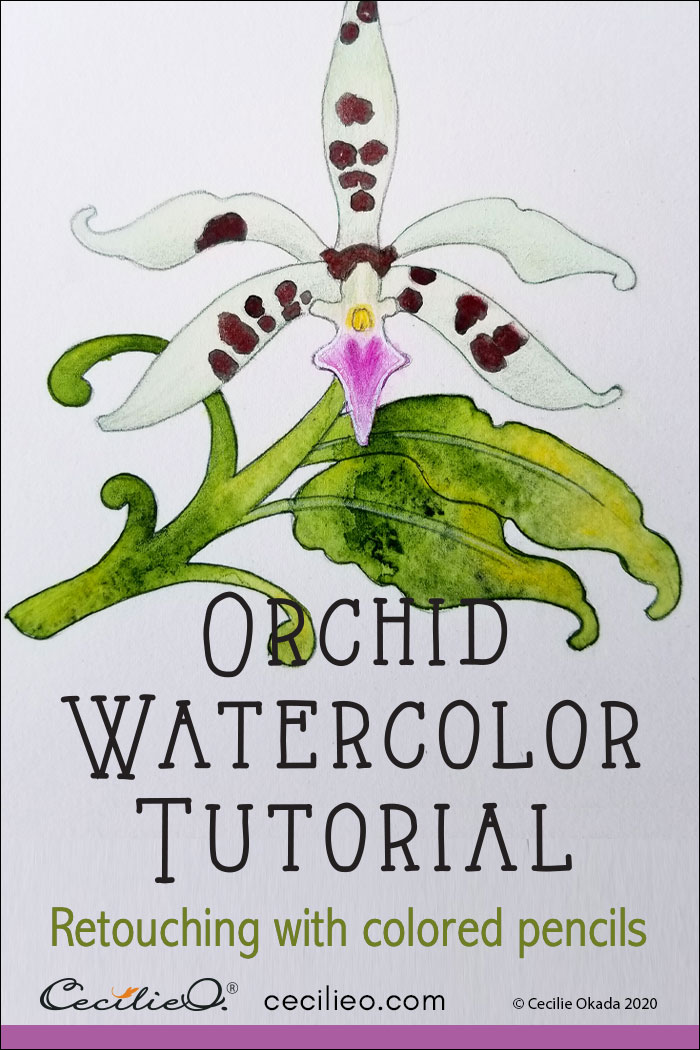
Orchids are cherished for their ornamental beauty everywhere on this planet. Set apart from other flower species, they brandish amazing, surprising details. The design is lavish. I’ve never seen anything like this brown-spotted orchid, and it’s easy and fun to watercolor.
It caught my attention during a visit to the Kyoto Botanical Garden. The graceful shape was a joy to draw because I love decorative art. I embellished it a little bit; I just couldn’t help myself.
Orchids are known not only for their elegance. Most cultures consider it a highly sensual and romantic flower too.
Let’s get on with the watercolor.

Drawing the orchid
I’d like to let you know that you can download the drawing of this flower in the One Tree Art Club. It’s free, and you can trace it onto watercolor paper. If you prefer to draw the flower by yourself, follow my steps.
I don’t think there is a specific way to draw flower shapes. To me, the easiest way to get it right is to let my pencil dance around freely. Draw lines on top of lines until you like what you see. Do this on sketching paper, not watercolor paper. Frequent use of an eraser will also damage watercolor paper.
When you’re happy with your drawing, get your tracing paper out. Trace the loose sketch with a neat, clean line. That’s what I’ve done here, and what you get as a free download. I’ve transferred my clean drawing onto watercolor paper in this tutorial.

When you transfer a drawing this way, you also get to place the outline nicely onto the watercolor paper. There is no skewing to the left or tucked in a corner by accident.
Painting the orchid with watercolor
Before you add water to the main body of the flower, paint it with plain water. In this way, pigments will spread out organically.

The base color for this orchid is a pastel green. It’s unlikely that you have this color in your palettes. You have to mix it. The make a pastel color a white base is always necessary. Mix with shades of green (as in the picture) until you get the right color.

I’ve used white gouache paint, which is a kind of watercolor, with a higher concentration of pigment. You can see that the opaque quality of the white obscures some of the pencil marks. That’s why it’s a good idea to soak up some paint with a sponge.


Next, I painted a slightly different pastel green on the inner portion of the plant.

While the green is still wet, paint the tip of the shape with purple watercolor. Use tissue paper to soak up some of the pigments.

Let it dry, and then move on to the stems and leaves.

Again, paint stems and leaves with plain water first. Paint loosely with yellowish-green, then add some yellow. Let the colors mix freely and move with the flow of the water.

Paint the center of the flower yellow. Add the brown spots on the dry body of the flower.

Spicing up with colored pencils
The flower is rather flat, so we create some volume with colored pencils.


Note: The color numbers mentioned below refer to a color chart I made with all my colored pencils. You can download the chart as a PDF in One Tree Art Club. Use the colors you have; just match up the best you can. Be creative.
Draw shading with green colored pencils, using both a light and a dark color in the same spectrum. (Green 1-1, Green 2-3). If you don’t have a light green, a dark green only will do the job. Draw lightly.

Next, enhance the yellow and purple. Outline the yellow dot with sepia. (Yellow-4, Pink- 9, Brown 3-5). Paint a white outline around the purple tongue, using a fine brush.


Outline the flower with dark green again (Green 2-3). Make sure the tip is sharp and draw lightly. The line should be subtle.

Enhance the brown spots with a reddish-brown ( Brown 3-8)

Outline the stems and leaves with the dark green pencil. Mke the leaves more lively with lime and yellow. (Green 1-2, Yellow-2) I used a white colored pencil to enhance the purple tongue a little more.

And that’s it, my friend. Have fun!


