Every time I see colorful iris flowers on the wayside out in the country here in Japan, I simply can’t resist taking photos. The purple and yellow color specks on the petals look just like nature herself splashed some watercolor with total abandon. So it’s a given I that I had to try watercolor this pretty flower myself.
It’s easy to paint this iris, just follow the step-by-step tutorial below. Do email me if you have any questions!
My photos never came out quite right using a mobile camera, but it doesn’t matter. This flower invites improvisation anyway. It’s a native Japanese flower and it’s called Shaga Iris (Iris Japonica).
Let’s start.

I have drawn the iris directly onto my stretched watercolor paper, adding curls and swirls freely to create my own composition as well as ignoring the central fluffs in the photo. You can download a PDF of this drawing to print out, and then trace it onto your own watercolor paper. Learn how to trace and transfer in this step-by-step tutorial: How to Transfer a Printable Line Drawing to Watercolor Paper
Step 1: Paint a generous amount of plain water onto the whole flower.

Step 2: Apply a gentle wash of purple and moss green. The purple color usually comes ready-made in watercolor paint sets. You can make moss green by mixing grass green with a tiny bit of pink. Use your brush to dab the colors with lots of water instead of painting with linear movement.

Step 3: With a watercolor sponge, soak up the majority of color. You want to leave a faint purple-green wash. You can also use a piece of tissue paper to soak up the color.

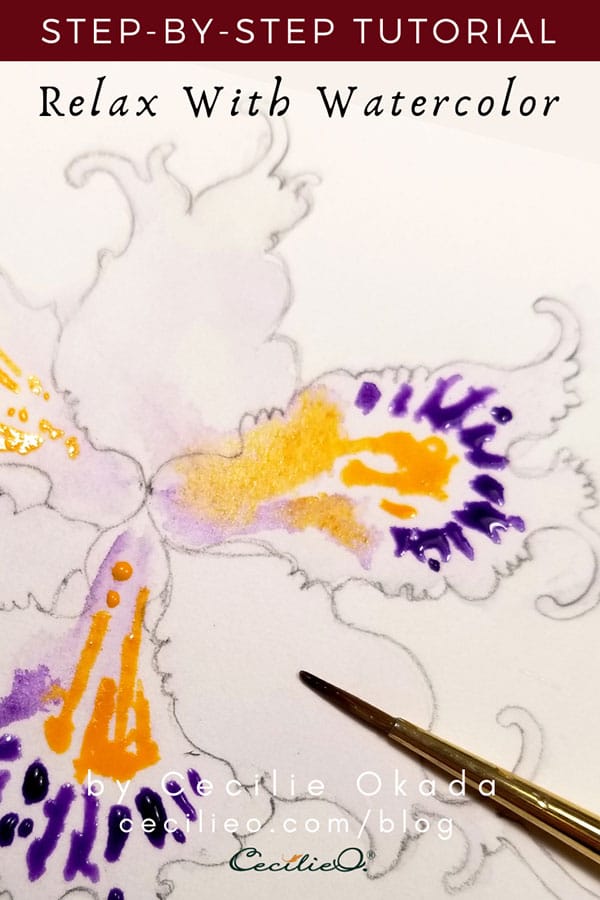
Step 4: While the paint is still damp, but not soaking wet, apply purple in the center of the flower using your brush in a linear fashion. For effect, don’t try to make it perfect and the same in each of the three directions. The photograph is a guide, nothing more. You are painting your own idea of an iris, not the photo of this not-too-fresh-iris flower.

Step 5: Add some purple to your mixing palette and dilute so that it is very watery. Pick up this purple color with your brush and carefully draw the linear spots. The key here is to move the brush very slowly and carefully, steering the flow of water and lifting your brush off the paper just at the right moment.

Step 6: Apply the yellow spots in exactly the same way, allowing the paint to drift off task if it so happens. Let the “accidents” create interesting variations. You can mix the orangy-yellow color by adding a tiny bit of red to sun yellow.
And that’s it! Simple and easy.

Step 6: Lastly, I carefully added some green in random places similar to where the photo shows grey spots.

If you want to add a background color, wait until the painting is completely dry. Before adding the color, paint with water around the edges of the flower, stretching as far out on the paper as you prefer.
Happy painting to you!


