

Estimated reading time: 7 minutes
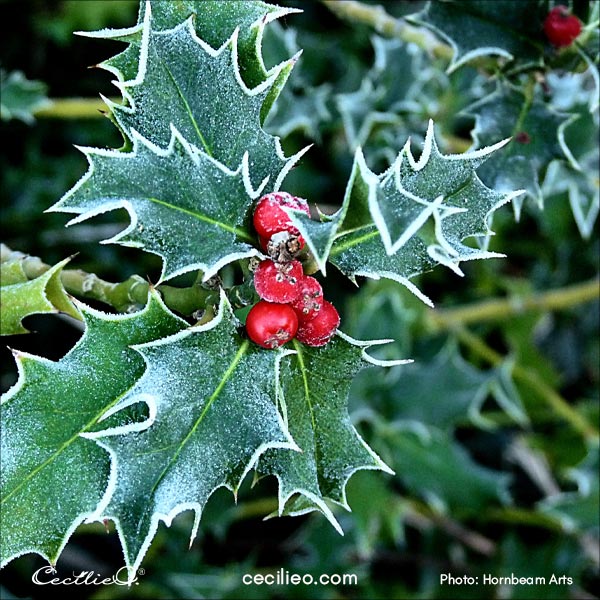
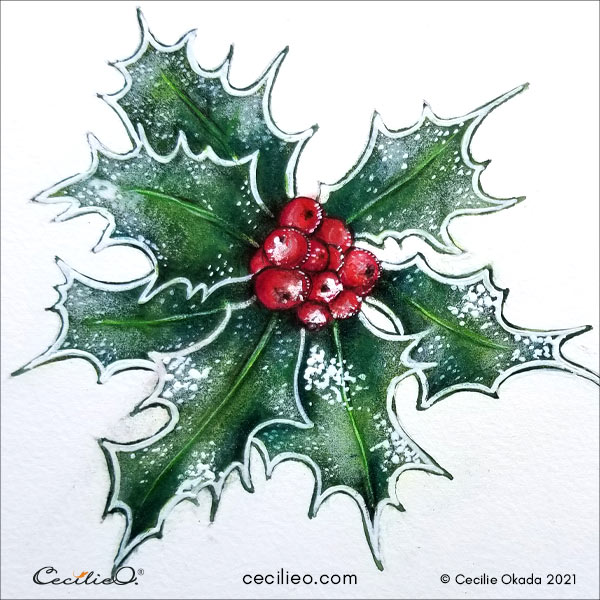
Shiny holly leaves with bright red berries are synonymous with Christmas. When covered in frost and snow, they make for an even prettier sight. In this tutorial, I will take you through the process of painting a watercolor holly. We use white gouache for frost and snow. The shiny part of the leaves might look like a challenge. But with a little bit of help from colored pencils, these highlights are easily achieved.
I have made a video where you can see how I painted the frosty holly:
Holly symbolism
Before we dive in, let’s go beyond Christmas. Did you know that in the spring, there are delicate, scented flowers instead of berries on the holly tree? That lightning can’t touch it? In ancient Celtic and Norse mythology, holly was seen as a great protector for this reason. Birds too love it for protection. Building their nests among the spiky leaves keeps predators at bay. Holly is a sacred tree, that has come to symbolize peace and goodwill.
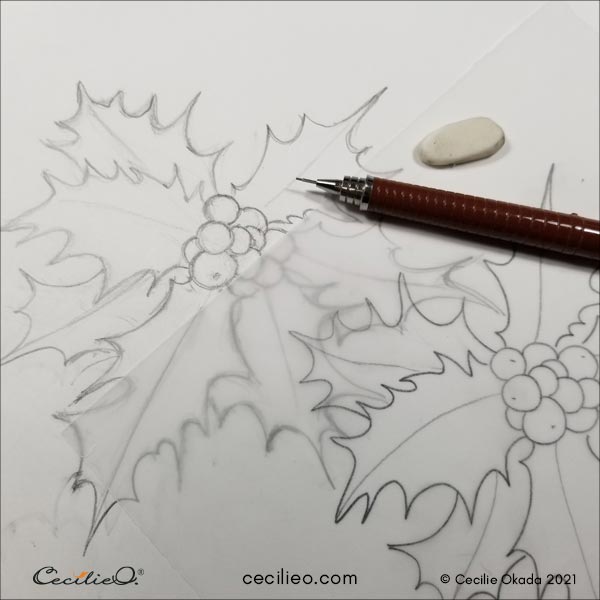
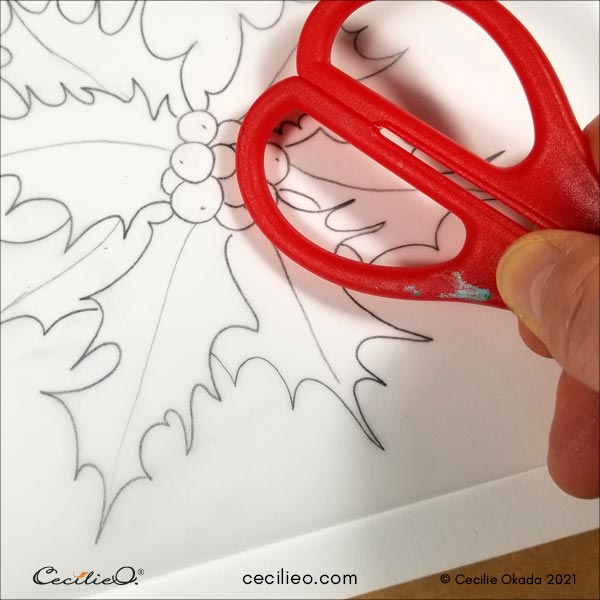
Step 1: Drawing a holly composition
Drawing from the reference photo of the holly, it was clear that I had to improvise. There are too few leaves and berries. I created a new composition. Please feel free to download my drawing for your painting. (Members: check your newsletter for access). You can trace it and transfer it to watercolor paper. If you want to play around with your drawing, your task is easy. The shapes are simple. Designing the picture will tickle your creativity.

Step 2: Painting the leaves with watercolor
The leaves are a dark blueish-green color. By mixing green with blue, you can get an approximate color. Paint all the leaves and make sure to use enough water.
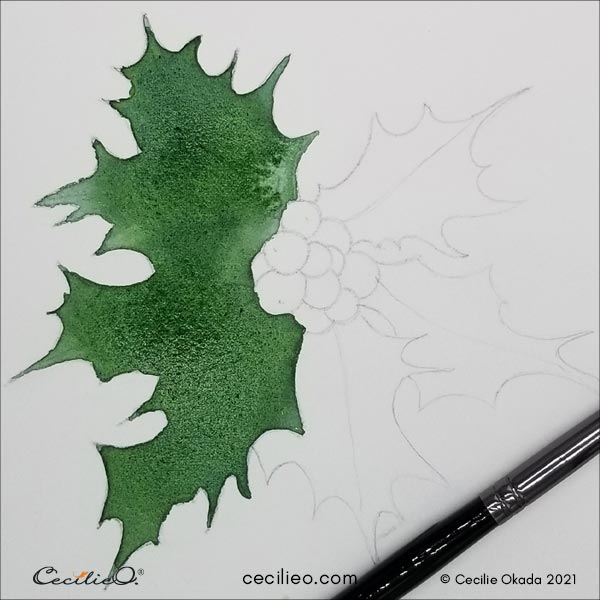
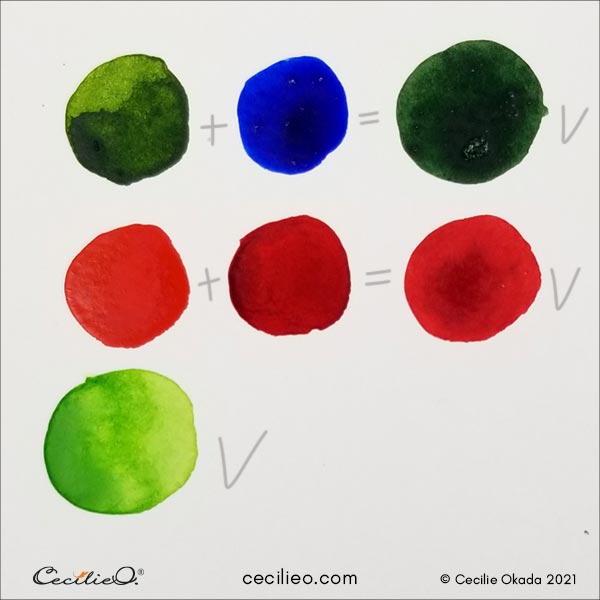
After the watercolor dried, I painted a second layer to make it dark enough.
When all the green is dry, paint the red berries. With dry green neighbors, the red paint won’t bleed.
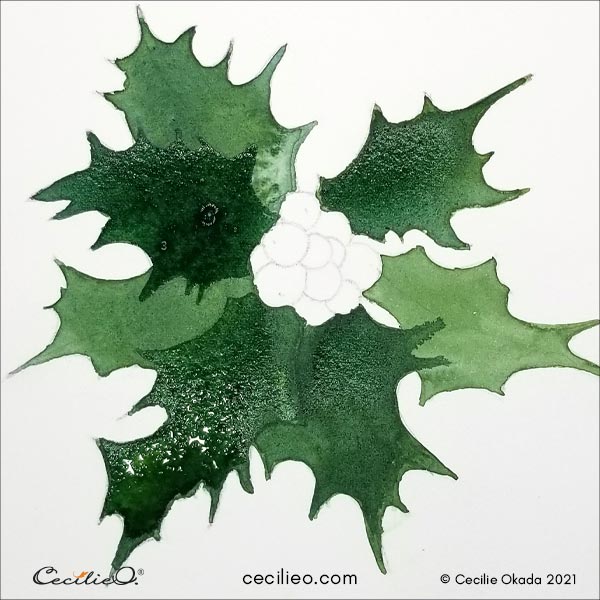
Step 3: Drawing light areas with a bright green colored pencil
We could have used some light green watercolor along with the darker blue-green. By drawing with a colored pencil instead of watercolor, we get a bit of texture. Holly leaves are smooth, but the frost and snow make them look textured.
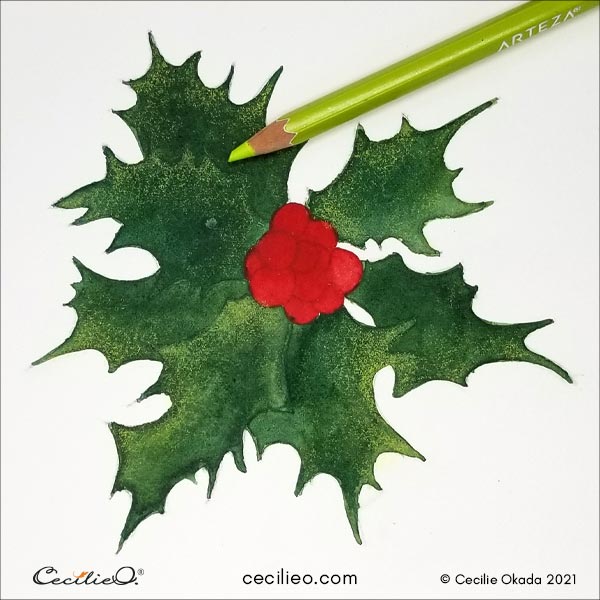
Step 4: Painting the white frost rim on the leaves
To paint the white line along the edges of the leaves, you need white gouache. Gouache is watercolor with a dense concentration of pigment. It is opaque and useful in so many other ways, too, when painting with watercolor. The watercolor “rule” is to leave white areas without any paint as the white color. Using gouache is so much easier.
Make sure to use a fine tip brush to paint the white lines

Step 5: Drawing with a variety of light and dark colors
Get your variety of green colored pencils out. Draw on the leaves with abandon. A bit of light green here, some dark green there. Light and shadow. The watercolor must be absolutely dry before your draw.
Outline the berries with a dark brown pencil, and draw the shadows too.
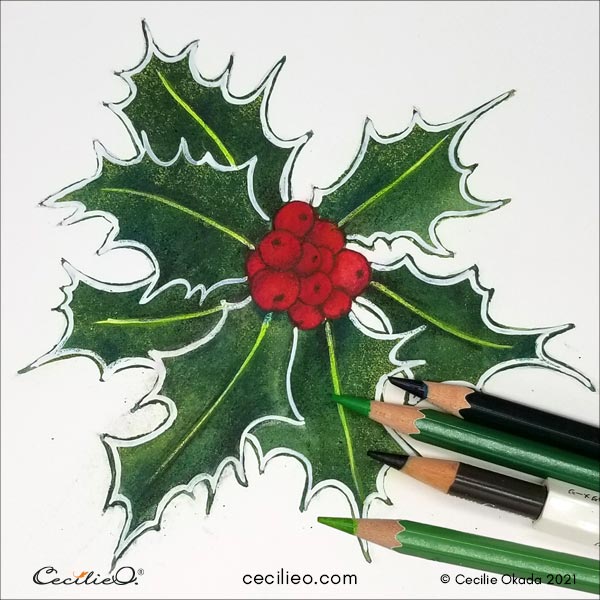
Step 6: Spoil the drawing with apple green watercolor
The leaves don’t have a natural look with the stark white outlines, and the green shading looks flat. Time to stir things up. With plenty of water, paint with some apple green color on the leaves. Be careful not to wash the white center lines away. The purpose is to create some lively green shades.


Step 7: Paint the white snow with gouache
When the watercolor is dry, it’s time to let snow fall down on the leaves and berries. With a fine brush, paint a lot of white dots. Don’t spread the dots evenly. That will make for a boring picture. Instead, cluster the dots in parts of each leaf. In some places, add more white. The same goes for the berries.
To complete the painting, get your colored pencils out again. Draw darker shadows and white highlights with a white pencil. Add some more fresh green here and there. Use your creativity to make the holly come alive. And then you are done.
Happy drawing and painting!
Video tutorial of a frosty holly
If you wonder about the art materials needed to do this tutorial, you can check out my Guide to Art Supplies.
Here are some more tutorials you might like:


