

Estimated reading time: 6 minutes
Snowflakes are one of nature’s wonders. No two are alike. It is hard to imagine how a blanket of snow contains millions of stunning, mandala-like designs. Perfect snowflakes drawn with graphics software is a common sight. In this tutorial, you will learn how to watercolor a real snowflake. It has no sharp, uniform lines. It is full of irregularities. But the underlying geometric formation is precise.
The other day, I stumbled upon the snowflake photo collection by Alexey Kljatov. My jaw dropped as I was leafing through all his photographs. I am showing you how to paint an irregular snowflake in this tutorial. But for your painting, you might as well select another photo. Choose a design from Kljatov’s beautiful photo collection.

Step 1: Drawing the snowflake
Drawing a snowflake accurately freehand is nearly impossible. You will have to use a compass, protractor, and ruler. An easy way is to simply trace the photograph. That’s what I did. I inverted the photo in Photoshop so that the outline is black instead. You can download both the inverted photo and my outline for free. (One Tree Art Club members: Check your newsletter for access).

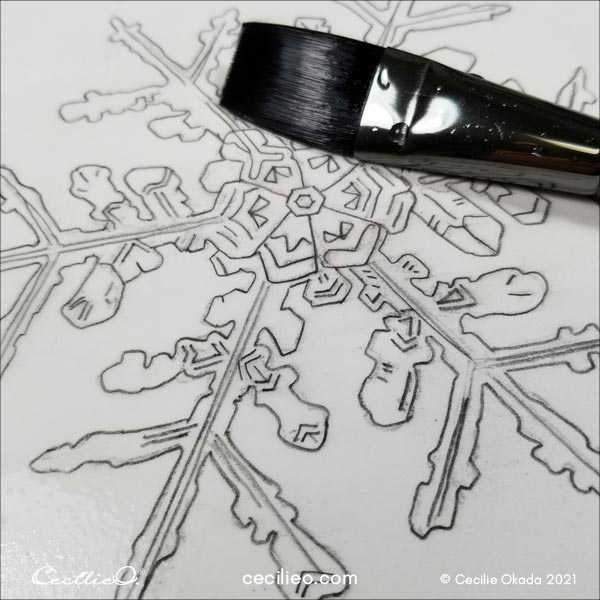
Below you can see how I transferred the outline onto watercolor paper.

After transferring the outline, you must redraw with strong, clear lines. The watercolor wash will otherwise render the pencil marks nearly invisible.

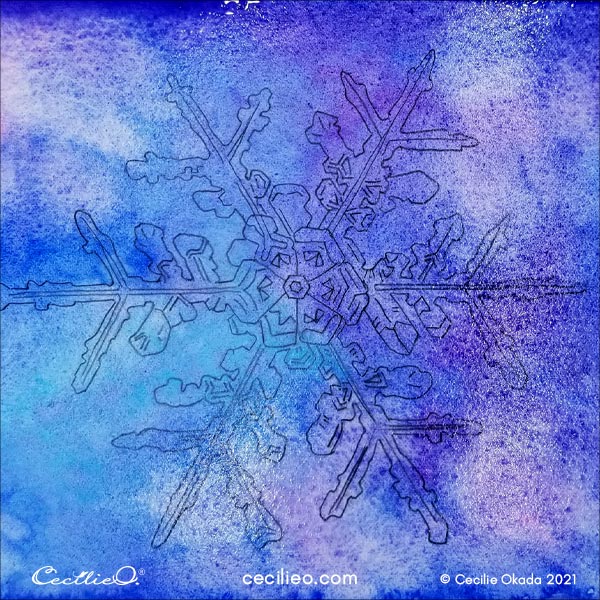
Step 2: Painting the watercolor snowflake background
I decided to step away from the brown background color in the photo. Blue is a cold color and a good choice for snow. Paint the whole paper with plain water first. It will create a fluid effect where the colors merge into each other. The water makes the colors blend. A broad brush is handy when you are painting a large surface.
Start with an ultramarine blue.

To create a compelling surface, continue with other shades of blue and purple. With a round brush, move the paint in circles to help the colors blend.
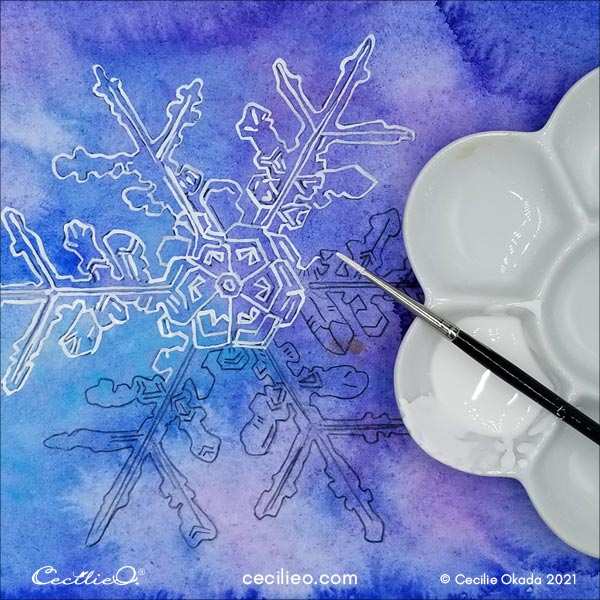
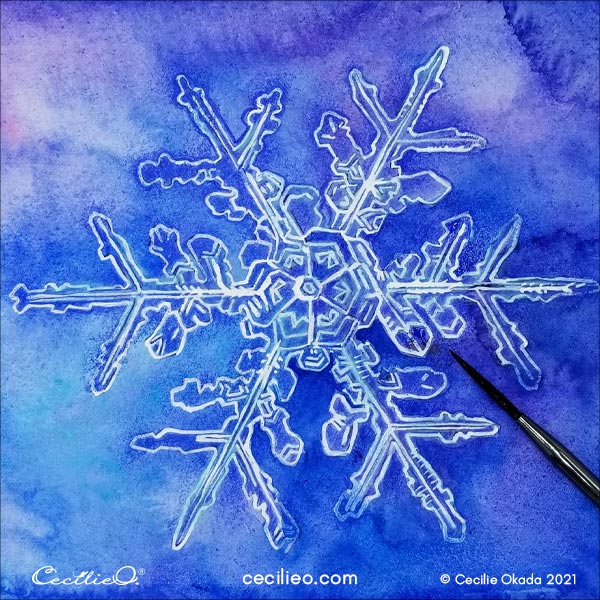
Step 3: Drawing the white outline of the snowflake
If you study the reference photo, you will notice that the white outline is irregular. In various places, the line is thick, thin, or nearly invisible. For this reason, I used white gouache. You can draw the outline with a white gel pen as well. It is easier. In that case, you will get even lines.
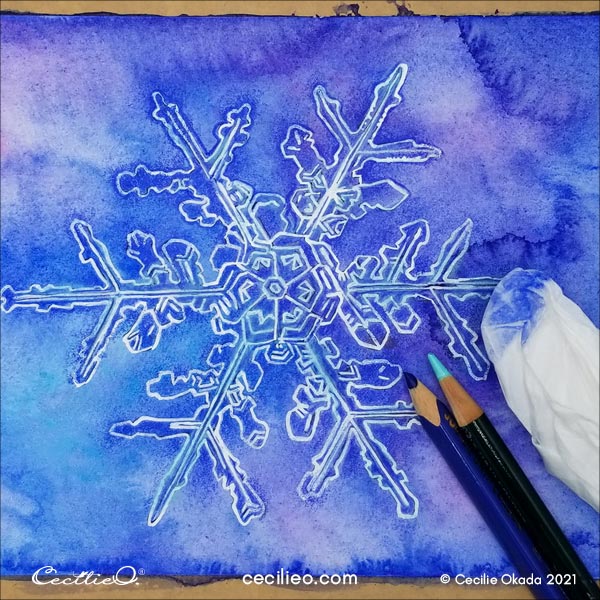
Step 4: Spicing up with colored pencils
The aim is to make the snowflake look somewhat realistic. To this end, experiment with white and various blue colored pencils. You may add some more white gouache where there is more “shine” as you can see in the reference photo.
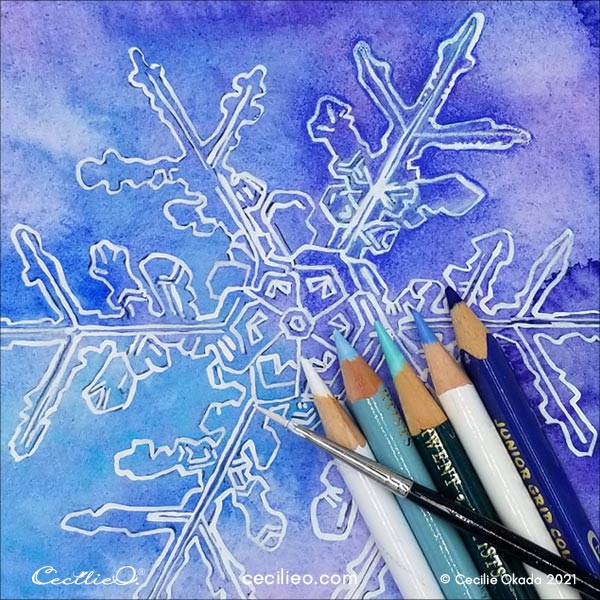
To make the shape stand out better from the background, draw inside it with a darker blue color.

You can draw around the shape as well with the darker blue. To make the colored pencil marks blend with the watercolor, use some tissue paper to smudge. If the white color loses sparkle in some places, repaint with the white gouache. You can also reinforce highlights with a white gel pen.

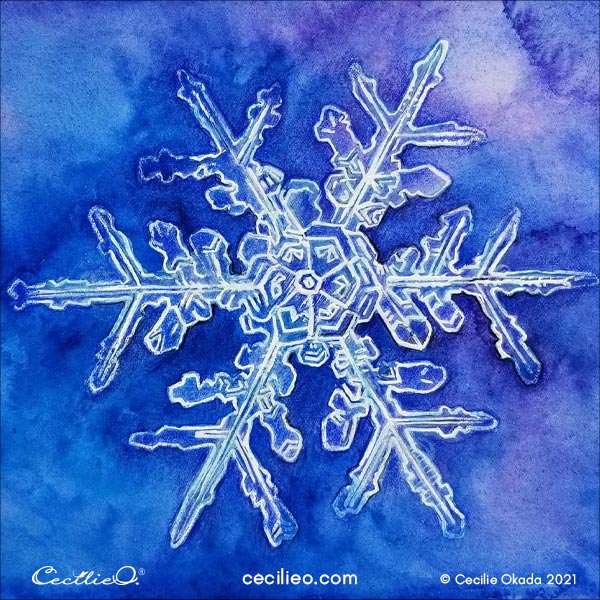
Step 5: Repainting the background to increase the contrast
To continue increasing contrasts, repaint parts of the background. Be selective and use your creative eye to preserve the original colors.
I think I repainted too much of the background. The contrasts are better in the image below, but it was more interesting before. I prefer the image above. How about you, what do you think?
Happy watercolor snowflake painting!
If you are wondering about the art materials needed for this tutorial, please visit my Guide to Art Supplies.
Some more tutorials:


