

Estimated reading time: 4 minutes
What if you walk in a park and see a beautiful glass-like orchid with no name? The Japanese glass orchid has been loved in Japan for centuries. But scientists have taken ten years to decide it is a unique species. And for that, this unusual little orchid has made headlines worldwide. A watercolor tutorial that focuses on the glass-like petals seems quite in order.
About the glass orchid
Japan’s oldest poems, dating back to the 8th century, mention these dainty blooms. The little glass orchid pops up in gardens, parks, and among potted plants. I live in Japan, but I have never seen it. It was named “hachijoensis” because many samples were found on Hachijojima island near Tokyo.
Step 1: Study photos of the glass orchid
The photos that circled the globe’s news outlets all have a black background. With the black background, it is easy to see the glass-like quality of the petals. In this tutorial, I will keep a white background for simplicity.

Step 2: Sketching the glass orchid
The lovely curved petals are stacked one upon the next. At first, it may be confusing, but once you start drawing, you will see a pattern. The image below has my sketch and a part of the tracing with a clear outline.
The One Tree Art Club library has many free outlines for watercolor tutorials on this blog. (Members: Check your newsletter for login details).

Step 3: Painting the flower petals and leaves with watercolor
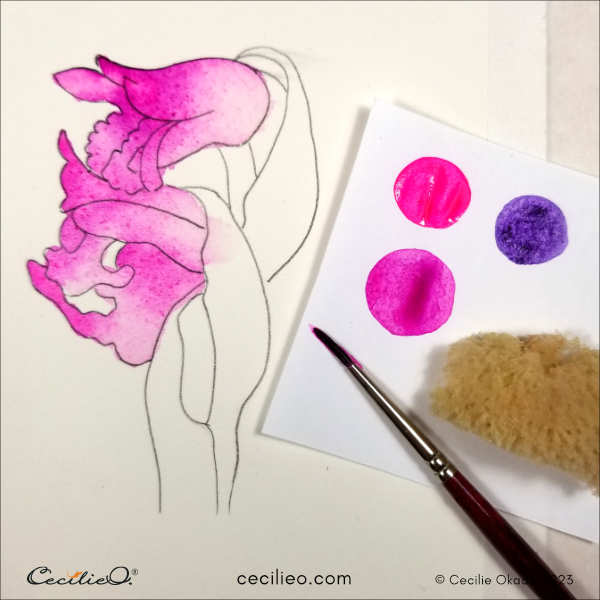
First, paint the petals pink. Use a sponge to soak up color where you want less color. The fuchsia color is a mixture of magenta a purple. Make sure to use enough water for the pigments to spread softly.
Paint the leaves.

Once the paint is dry, you may need to add some more.

Step 4: Finetune with colored pencils
Once the watercolor is dry, you can draw on top with colored pencils. The flower comes to life with the 3D effect.

Step 5: Paint and draw the glass-like effect
Let loose with white dots! Use white gouache to bring forth the glass-like look of the petals. Paint with a little bit of water over the dots in selected areas.

Draw lightly with colored pencils over the leaves to subdue the white specks. The leaf surface has a subtle glimmer.


I love orchids, and here are a few more tutorials with different varieties:
To explore the art materials you need for this tutorial, visit my Guide to Art Supplies.


