

Estimated reading time: 7 minutes
How do you make a full moon painting? The subject of endless poetry, mythology, and mystic musings, the moon is no less a favorite in art. But moonlight is not that easy to paint. In this step-by-step tutorial, I make it simple. A gleaming watercolor moon is within your reach.
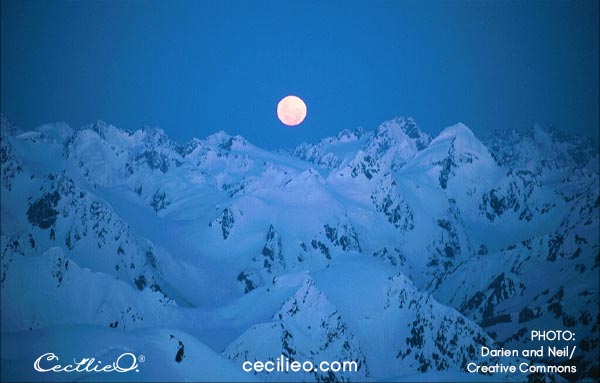
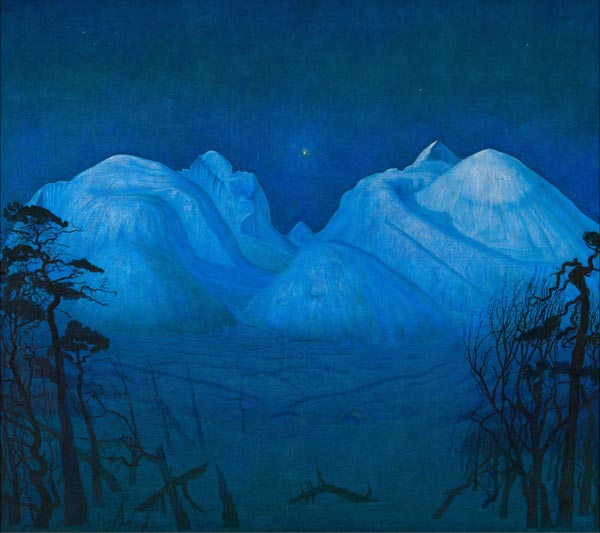
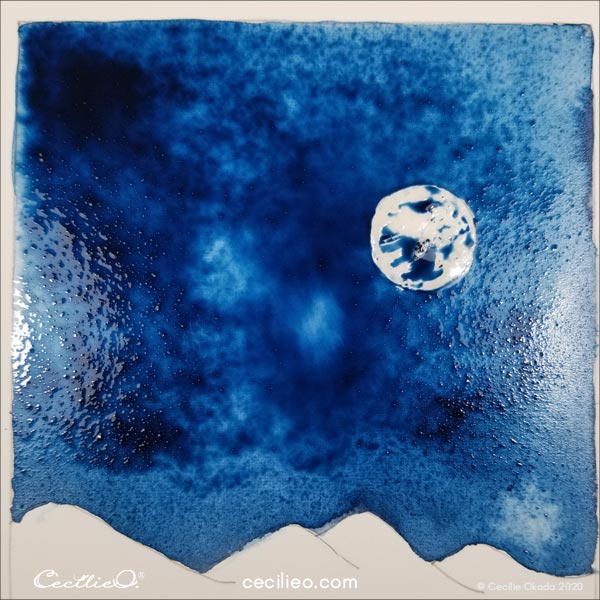
When I was looking for reference photos, I stumbled upon the image below. It instantly reminded me of an iconic Norwegian painting called “Winter Night in the Mountains”.
Most of my watercolor tutorials focus on realistic rendering. Here, I take a creative approach to highlight the moonlight atmosphere. Moon symbolism is intimately connected to creativity. It makes sense to use our imagination for this project.
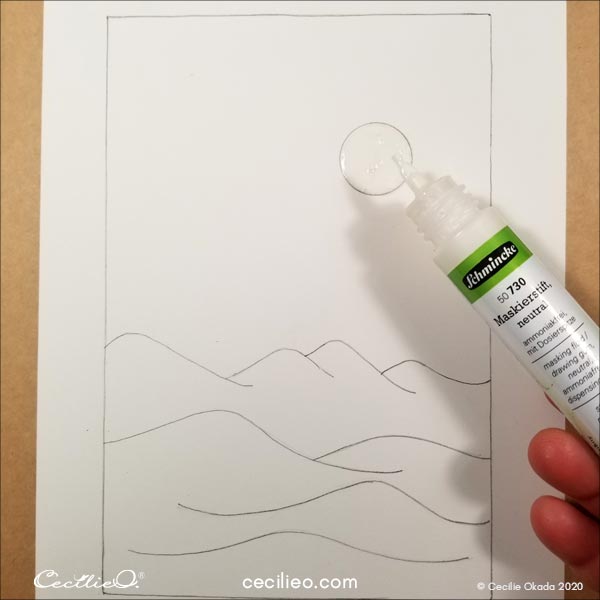
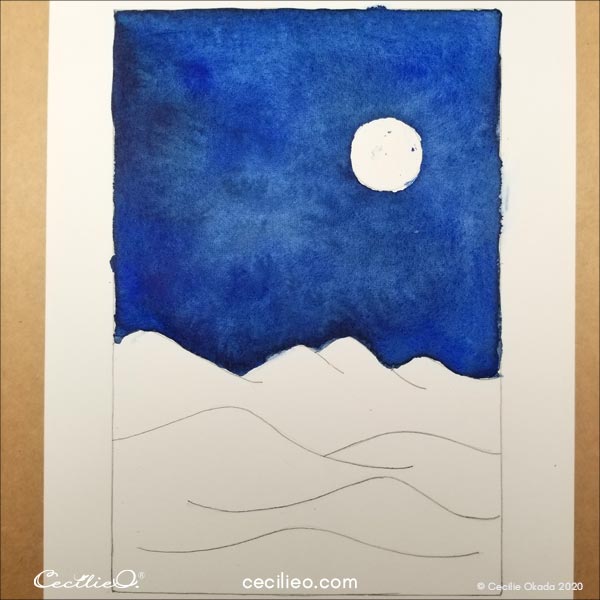
Step 1: Outlining the landscape.
Outline some simple mountain shapes. Use a compass to draw a circle for the moon. If you don’t have a compass, trace around a small lid instead.
Perhaps you don’t feel like drawing. You can download mine for free in the One Tree Art Club library. (MEMBERS: check your newsletter for library access information). Once you have printed out the drawing, trace the lines onto your watercolor paper.
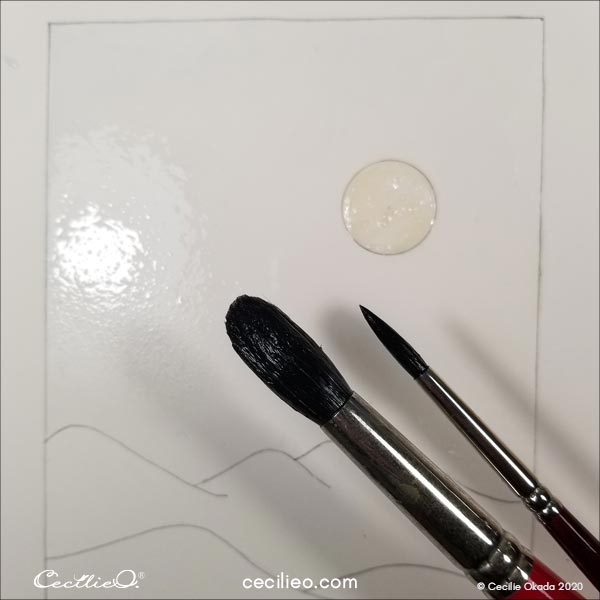
Step 2: Apply masking fluid to the moon.
You are going to watercolor the sky with a lush, blue wash. To make it easy, protect the moon with masking fluid. When the masking fluid is dry, you can start painting.
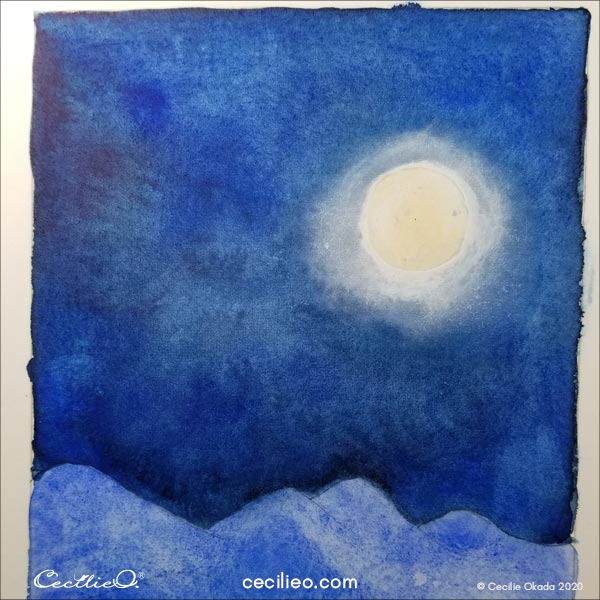
Step 3: Watercolor the dark, blue sky.
Paint with plain water first. Then, apply lush amounts of blue watercolor. You can use various shades of blue.
When the watercolor is dry, rub off the masking fluid with your finger.
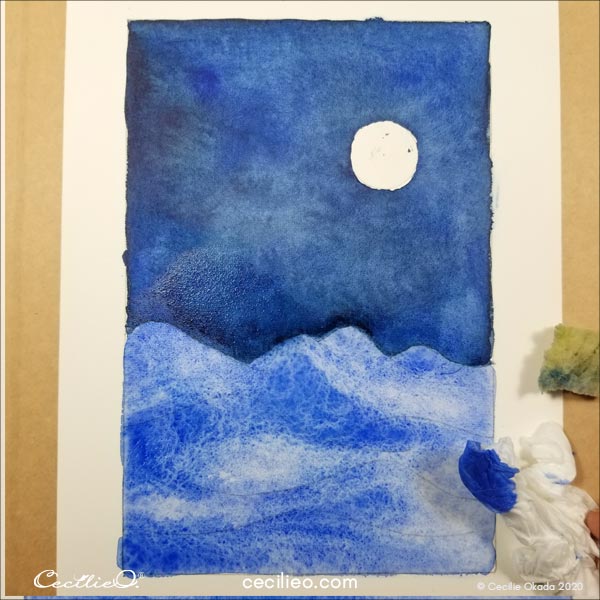
Step 4: Watercolor the bright, blue mountains.
The colors will overlap as seen below.
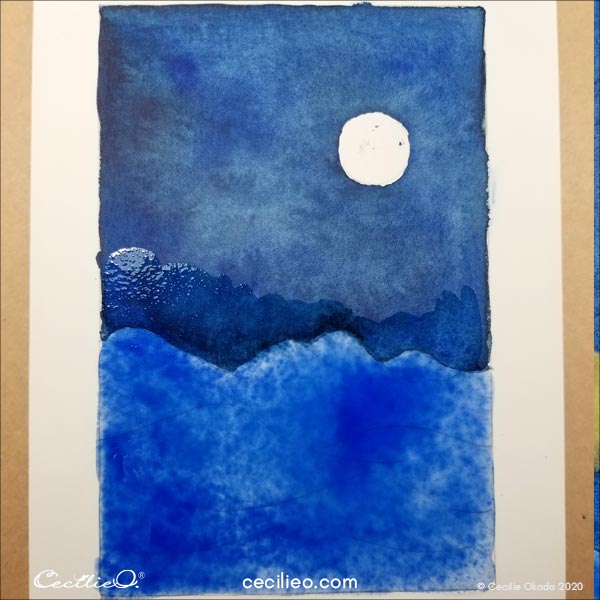
Use a sponge to soften the transition between the blue colors.
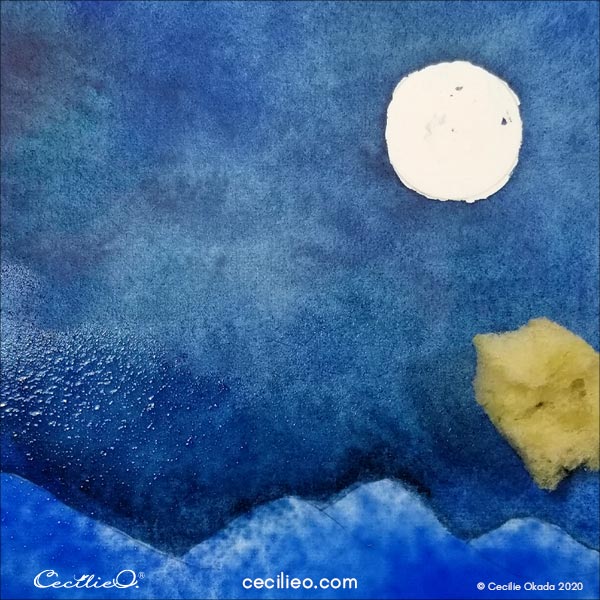
To create the look of mountains, soak up pigments with a sponge and some tissue paper. First, use the sponge. Refine the lighter areas by “drawing” with the tissue paper.
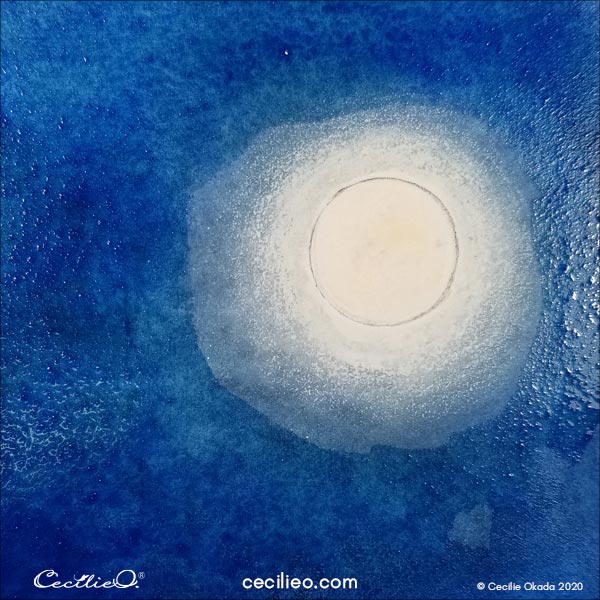
Step 4: The watercolor moon.
Paint the moon a pale yellow.

When the yellow watercolor is dry, paint over it with white gouache.
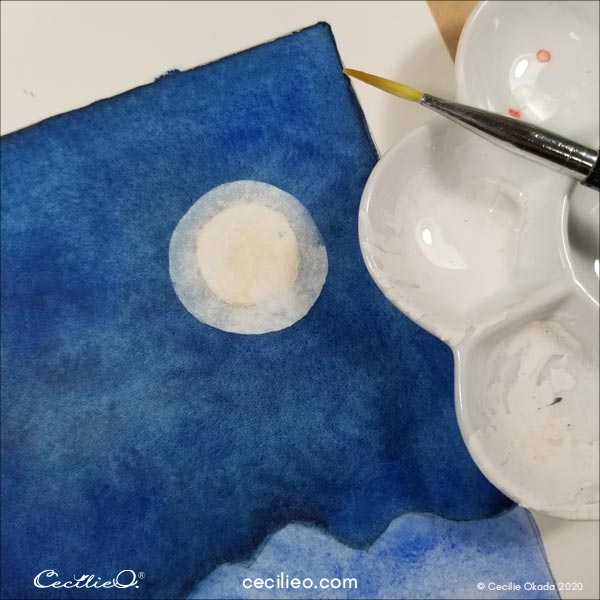
With your brush, use water to soften the edges. Soften further with a sponge.
Paint a thick, white circle around the moon.
Dilute with a wet brush and let it dry.
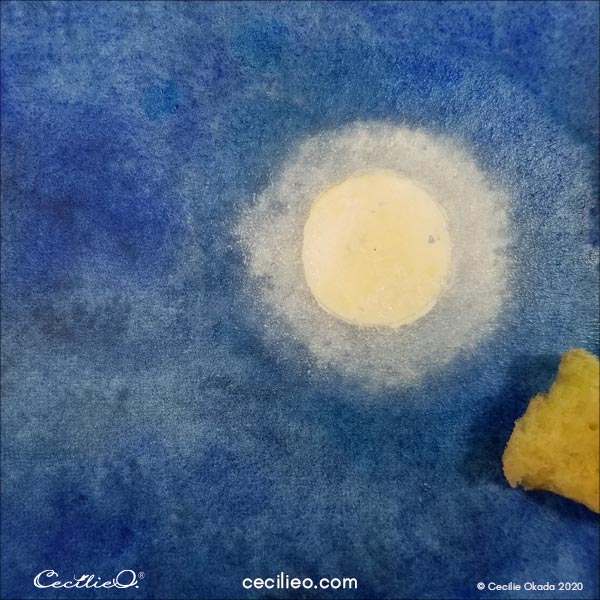
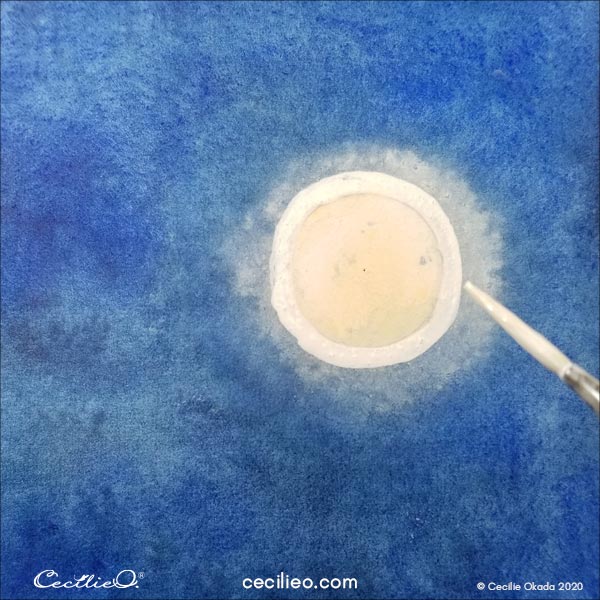
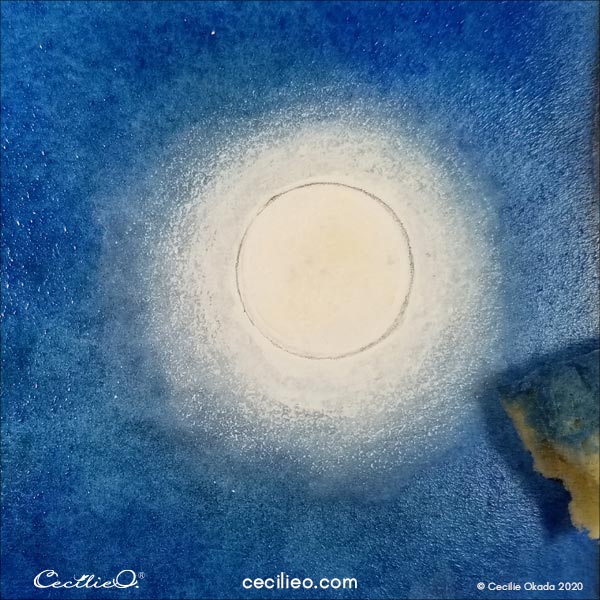
Step 5: Creating a soft light with colored pencils.
With white, colored pencils, draw on top of the white gouache around the moon. Since the white paint now is uneven, you will get a more natural, not-so-polished glow.
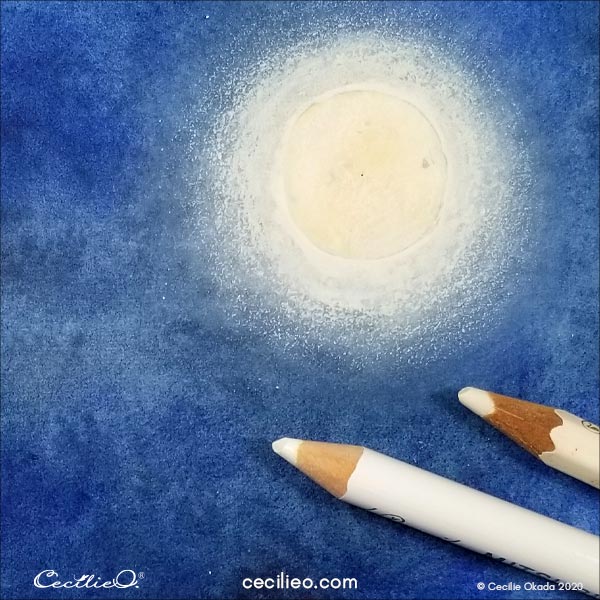
The mountains can use some drawing with white pencils too. For the sake of contrast, I painted more dark blue on the lower part of the mountains.
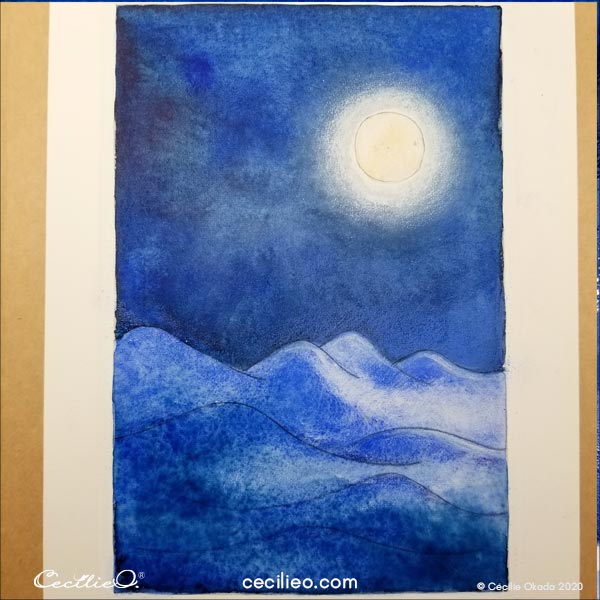
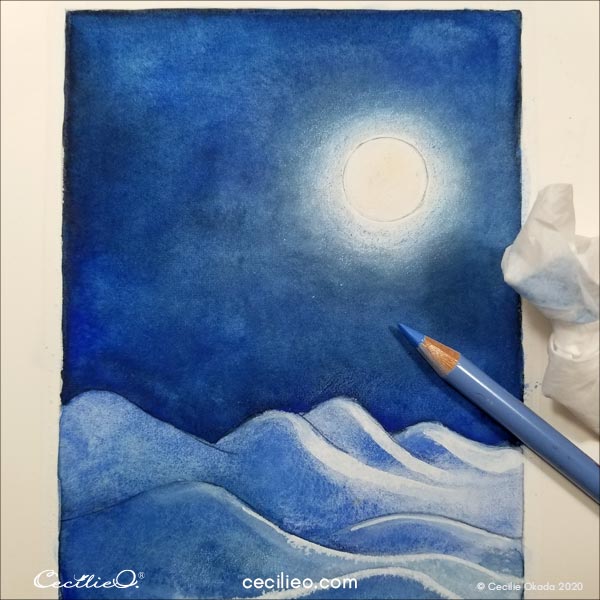
Step 6: Taking more drastic measures.
When I looked at the painting the next day, I thought it needed more pizzazz. Also, the moon was not truly round anymore.
A new wash with intense blue did well on the sky. For the mountains, I went for bold, white streaks of light. I corrected the moon circle.
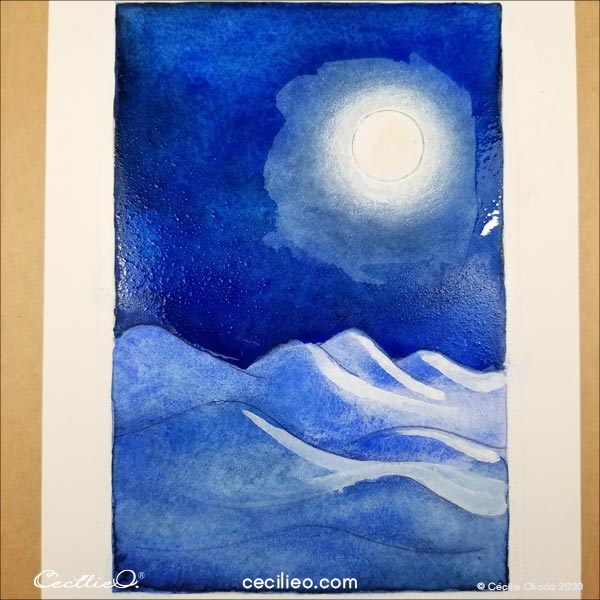

Below, you can see how I painted progressively closer to the moon.
While the watercolor was still wet, I used a sponge to soften the edges.
But…the moonlight looked too bright. With a blue pencil, I softly colored over the white around the moon. Then, with a tissue paper, I smudged the pencil marks. The light became more soothing and “moon-like”.
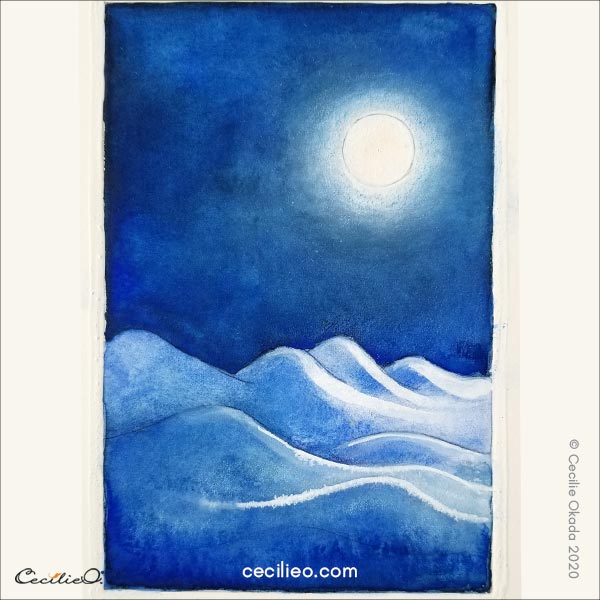
Finally, the watercolor moon painting was complete.
I have provided a list of art materials needed for this tutorial in my Guide to Art Supplies.
More watercolor tutorials on this blog ( a few out of many!):


