

Estimated reading time: 7 minutes
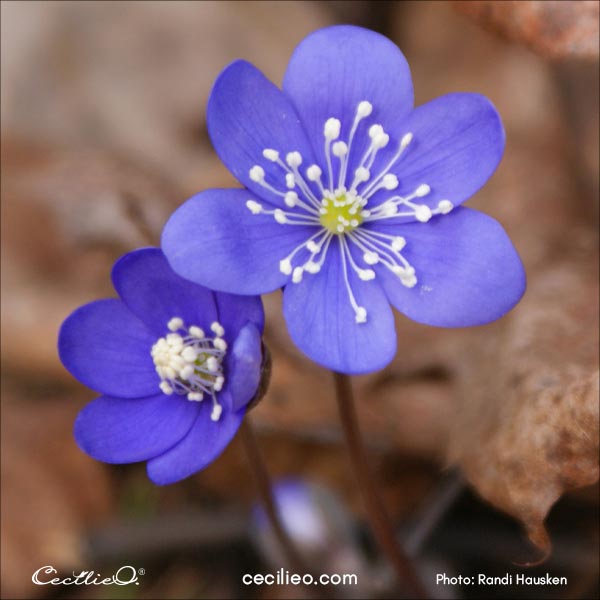
The smell of spring is sweet. When the buds of blue hepatica push through the soil, folks in Norway know that nature is ready to leap. If you want to learn how to watercolor spring flowers, get your paint and brushes ready. I will take you through the steps. These delicate and iconic flowers are easy to watercolor.
It was exciting and filled with wonder to forage among dead leaves to look for blåveis when I was a kid. We would pick a small bouquet and smell it with glee. These days, it’s forbidden. Also known as liverleaf or liverwort, it is an endangered species. But blåveis is still a potent symbol of spring.
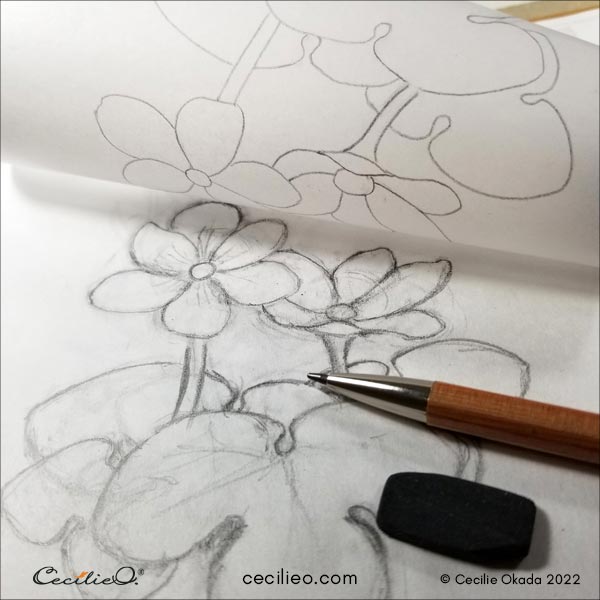
Step 1: Drawing the flower
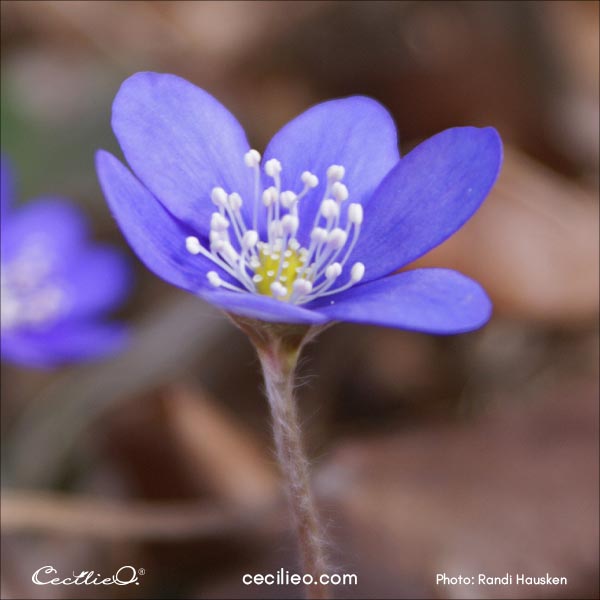
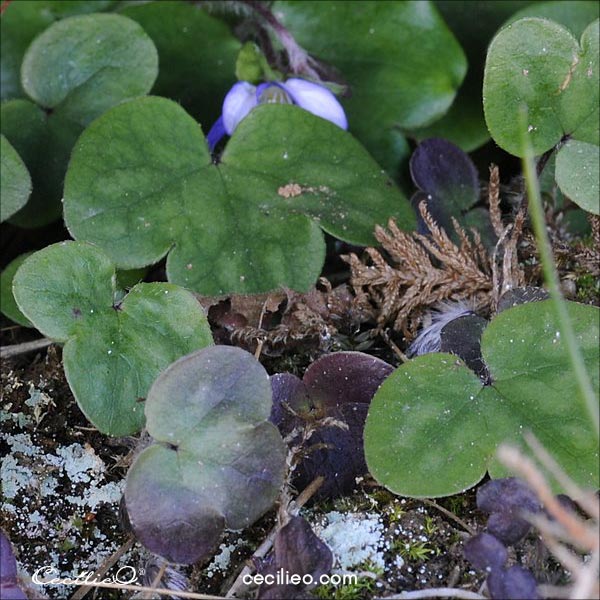
Combining three reference photos into one composition is an interesting drawing exercise. It forces you to be creative. But each one of these photos will do for a beautiful flower watercolor.
My rough sketch was messy. Drawing over it with tracing paper, I made a clean outline. Then I traced it onto my watercolor paper.
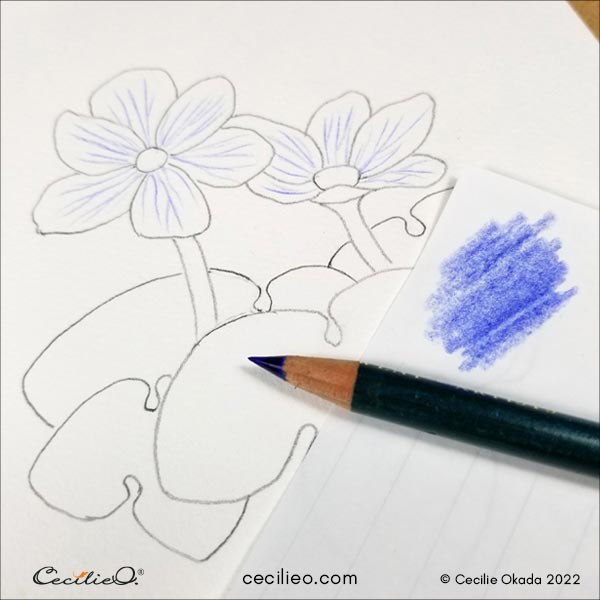
Step 2: Drawing veins on the petals
Have you ever pondered how to get the delicate veins on petals right? There are as many ways to do this as the roads to Rome. In my case, I decided to try a new approach. The hepatica flower is delicate, and I did not want to make strong lines. Only suggestions. So I drew a few lines with a blue colored pencil. Not watercolor pencils! The dry kind, so the lines would still be there when painting over them with watercolor.
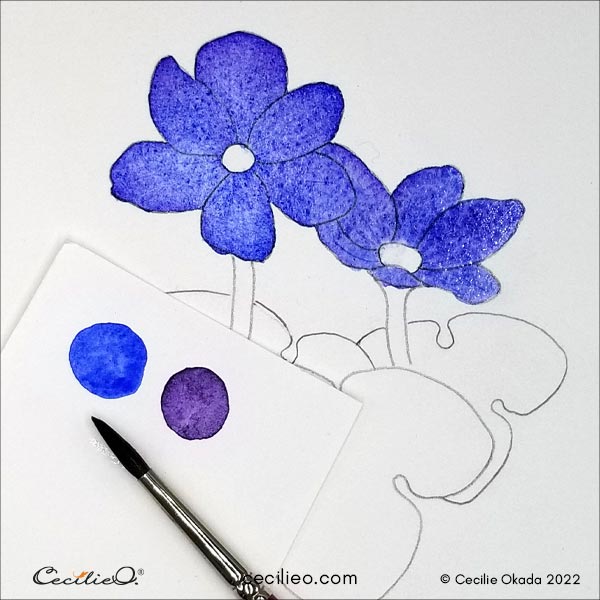
Step 3: Painting the blue petals
Let ultramarine blue and purple flow into each other to get the right color. Make sure to use enough water on your brush. Otherwise, the colors will not blend.
Step 4: Paint the leaves with playful abandon
First, paint dark green as a base. Mix fresh green with an indigo blue to get the right nuance.
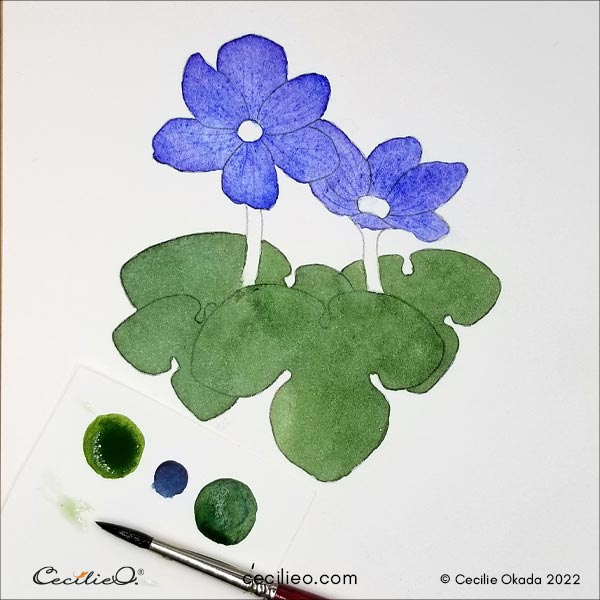
Next, paint over with various greens and browns. The idea is to create variety among the leaves. If you look at the photo of the leaves, you will notice many hues.

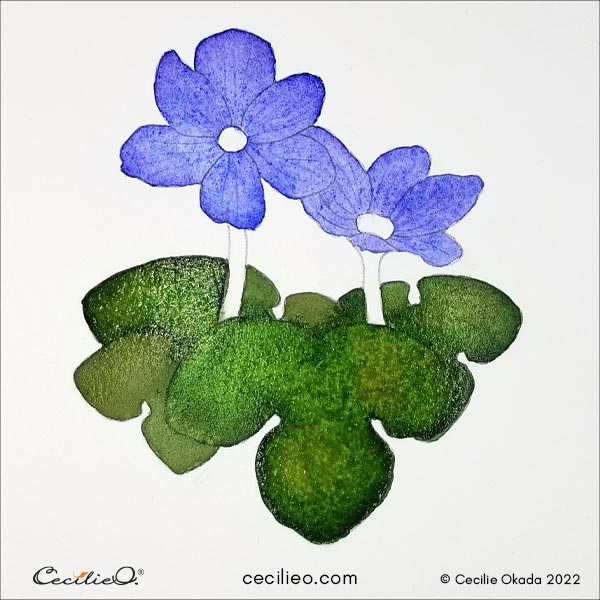

Step 5: Watercolor the flower center and stem
You get the light green by mixing green with yellow. Make the reddish-brown color by mixing brown, rose, and black.
Notice the nice bleed into the right leaf. It happened because the leaves were not quite dry when I painted the stem.
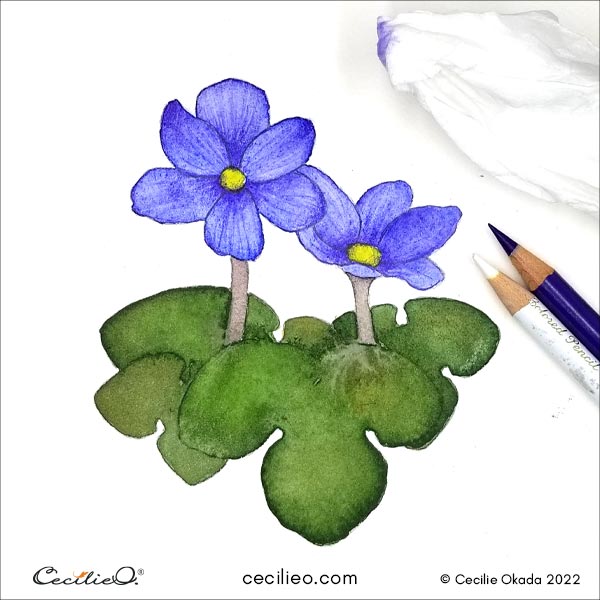
Step 6: Draw more details with colored pencils
At this point, I thought the veins on the petals were too faint. So I got my blue colored pencil out and drew in some shadows as well. Now they became too stark. That’s what I wanted to avoid by drawing before painting! I smudged with some tissue.
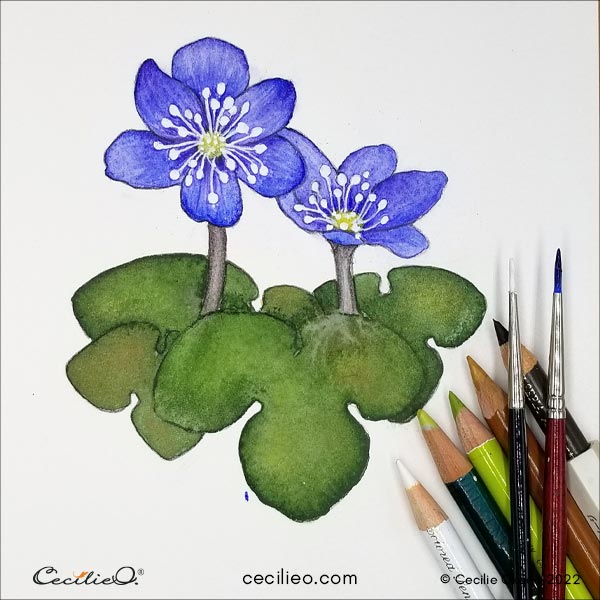
Step 7: Painting the white stamen
This is the fun part. Use some white gouache. Important: Do some test painting first. This way you can figure out the right consistency of the gouache. Too much water, and it will get transparent. Too little water and the thick paint won’t paint thin lines. Use a fine brush.
Now is the time to do some fine-tuning with various colored pencils.
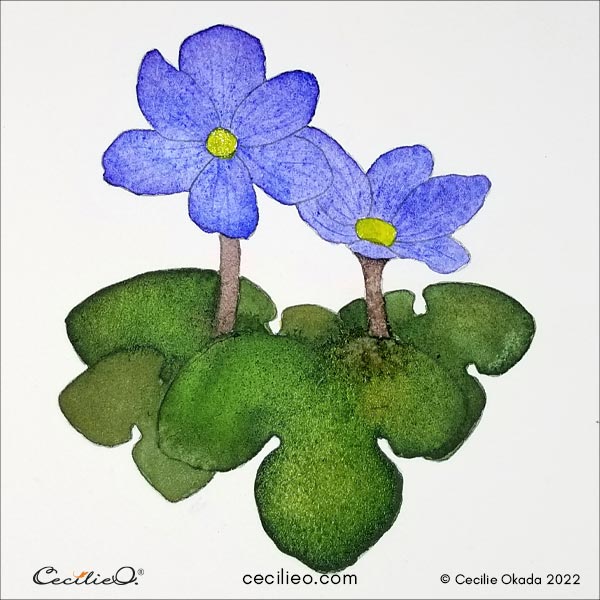
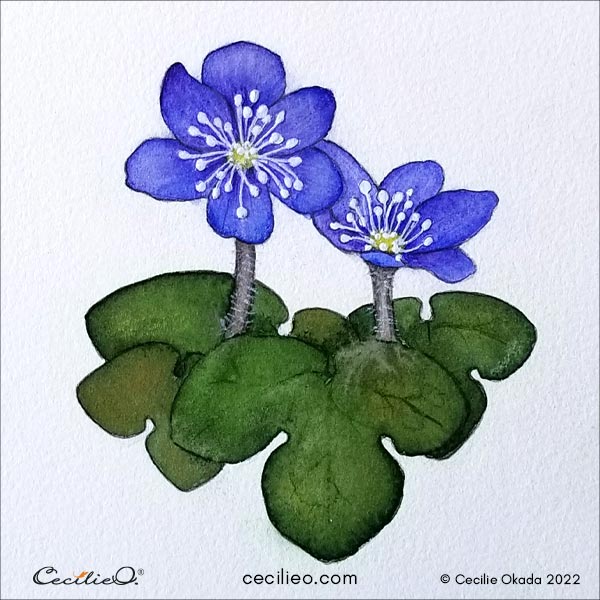
Step 7: Complete your watercolor spring flowers
In the end, I painted shadows with blue watercolor. I drew light areas with a white pencil. When it was all dry, I painted it over with a tiny bit of water. In that way, the veins on the petals became smooth and subtle. They also look more realistic.
In reality, the blue hepatica flowers have longer stems. I forgot about that when I drew my composition. But why not? Creativity does not follow any rules.
Introducing One Tree Art Club | Creative

If you enjoy my blog and find this tutorial helpful, please join the monthly membership to get the outline drawing for this flower. You can trace the drawing and transfer it onto watercolor paper. Focus on painting, not the basic drawing. The funds raised will be for equipment to make video tutorials and keep this blog going. For $5 per month, you will get 2-3 outline drawings for new tutorials. Go to my page on the Buy Me a Coffee platform. Outlines for 58 tutorials are still available for free.
For info on art materials needed for this tutorial, visit my Guide to Art Supplies.


