

How to watercolor light and shadow can be a puzzling exercise. How do you select the right color for the shadows? How to make it a convincing part of your painting? When you are a beginner, it is a good idea to practice with something simple. In this tutorial, you learn how to watercolor light and shadow on a single leaf.
Watch a timelapse video of the process. Below is a step-by-step description with images of the process.
I took the snapshot on a lazy afternoon walk. The sun cast strong shadows on every leaf and tree. Peering up close, I discovered the magic of shifting shadows.
Step 1: Examine the reference photo.
Let’s study the reference photo first. The first thing you need to consider is the direction of the light source. In this photo, it is obvious. The contrast between light and shadow is shown clearly. The light, coming from the left, also cast shadows on the stems. Let’s capture those tiny shadows as well in our watercolor.
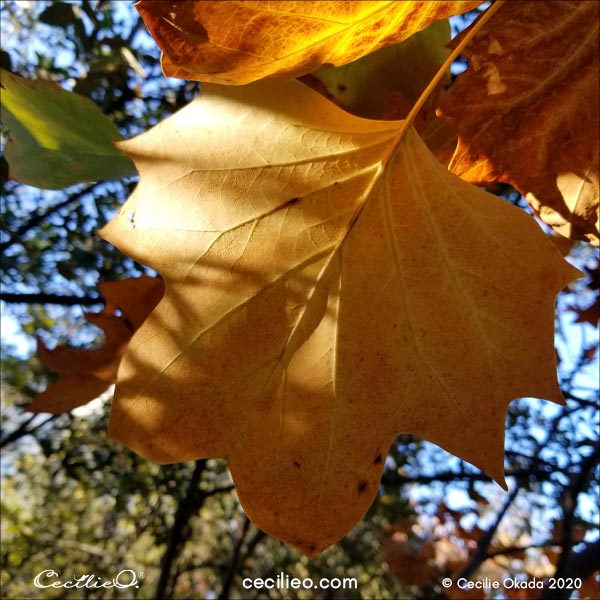
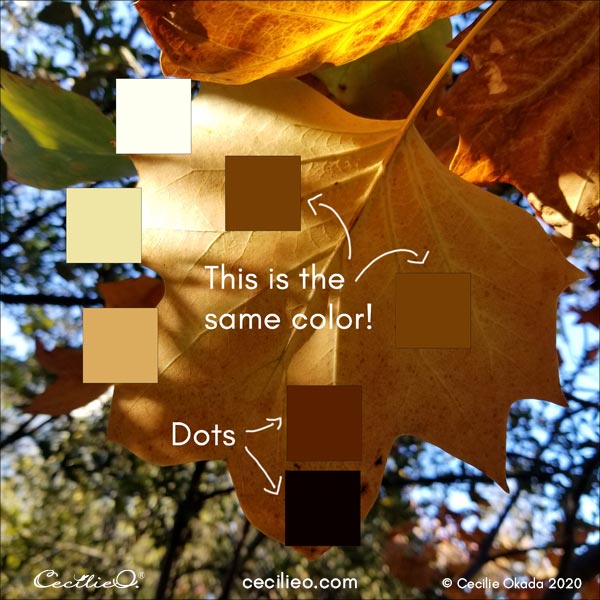
Colors look different against a dark or light background. I picked up the most prominent brown color on the right, shadow side. When you place that same color on the left side, it comes as a surprise how very dark it is. It does not look dark on the shadow side. This is one of the reasons why it can be so confusing to paint shadows.
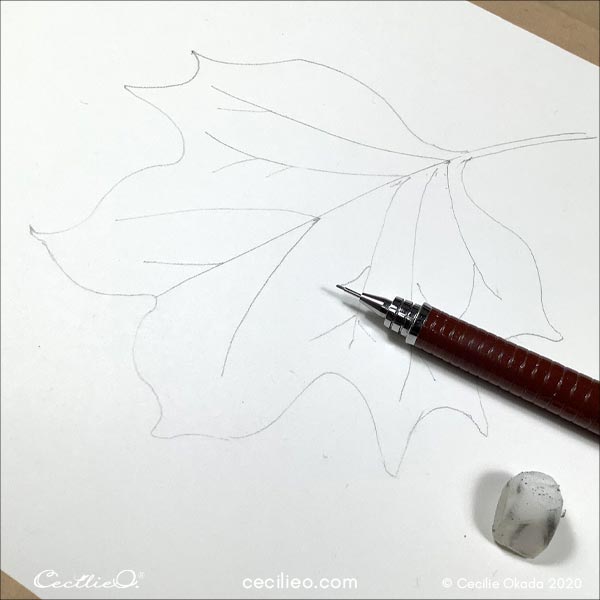
Step 2: Draw the leaf.
You can download my drawing from the free One Tree Art Club library. You can trace the leaf outline onto your watercolor paper (Already a member? Check your newsletter for information on access).
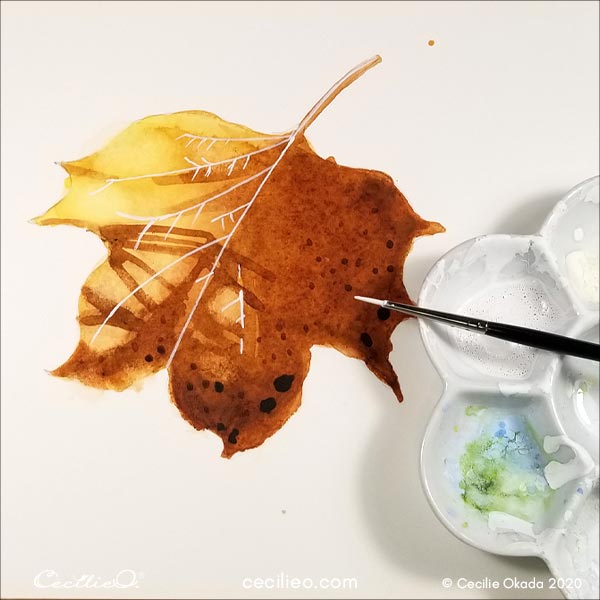
Step 3: Watercolor the shape of the leaf.
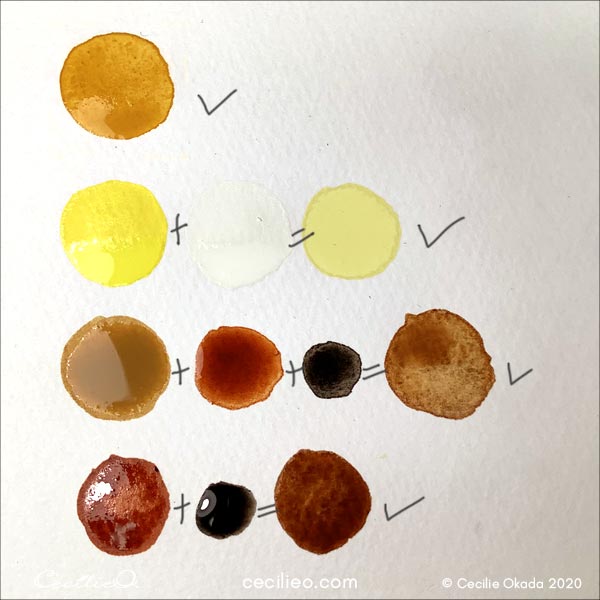
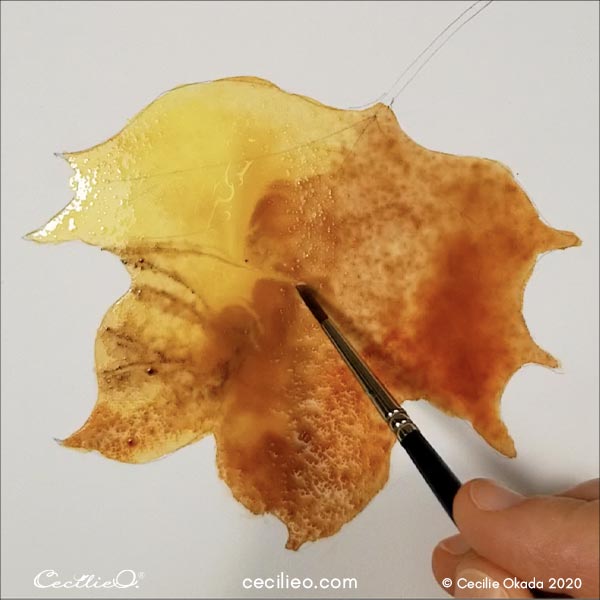
Watercolor the whole leaf with light ochre. Paint the right side with a darker brown color, and add some pastel yellow to the top left.
Let it dry.
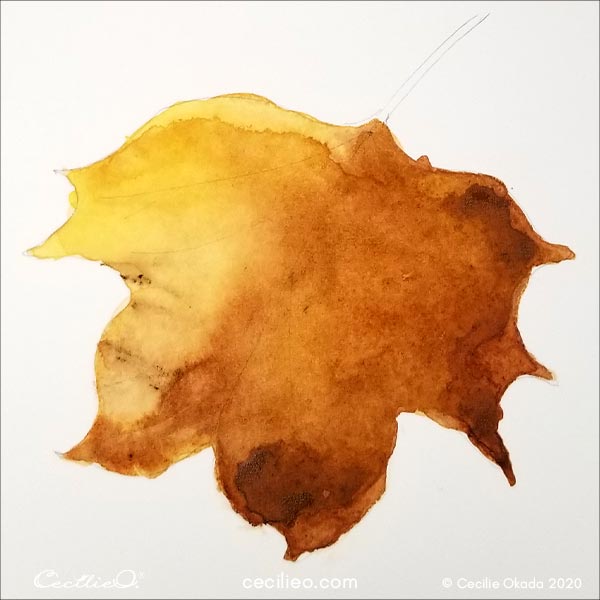
Paint the right side of the leaf again with the darker brown. With a smaller brush, watercolor the shadow pattern with the same brown.
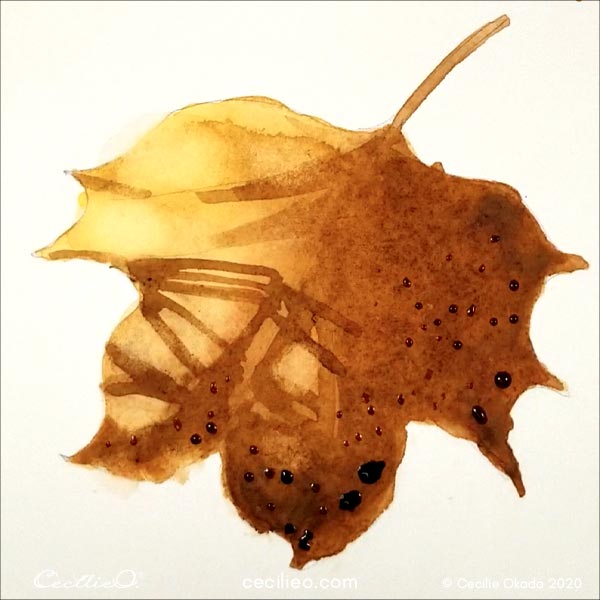
When it is dry again, spread out a few dark dots.

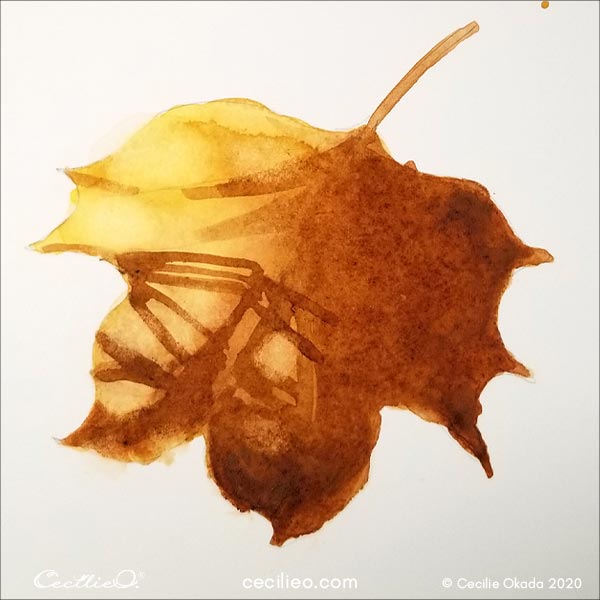
Step 4: Paint the veins and draw the details.
With a fine brush, draw the stems on the left side with white gouache. Make sure NOT to paint the veins on the right side. They fall in the shadow and will be rendered differently.
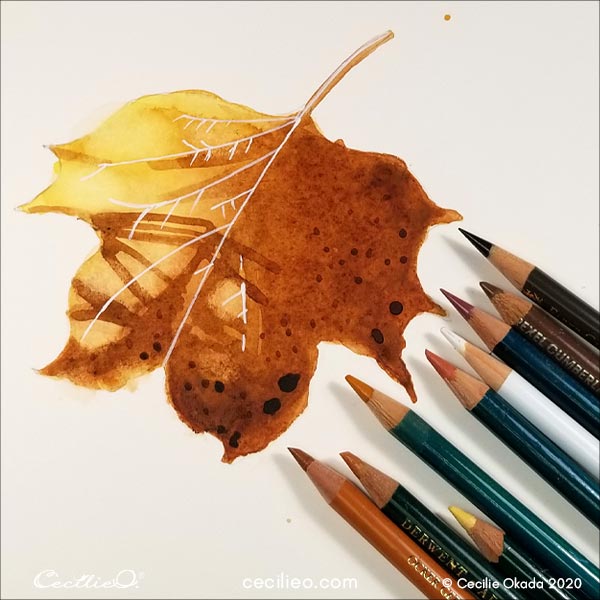
Below I show a selection of colored pencils. They span from straw yellow to ochre, terracotta, and dark brown. Use similar colors from your collection.
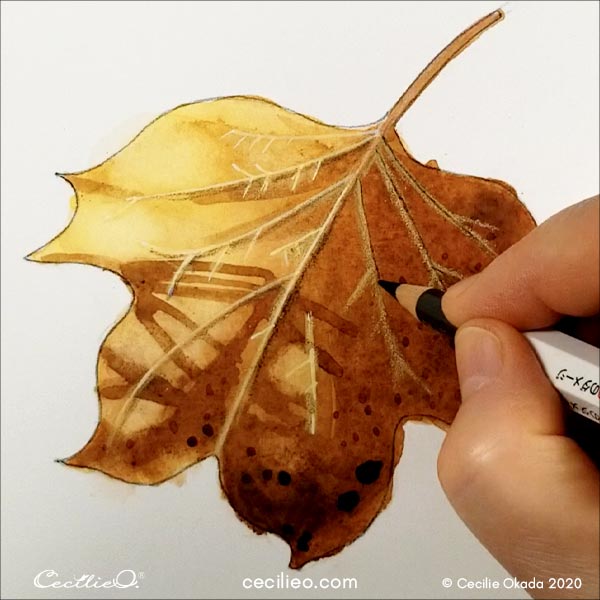
Redraw the outline of the leaf with a sepia pencil (dark brown).
With pale yellow and ochre, draw over the white veins.
Draw the veins on the right side with the same pale yellow. When done, draw the dark line that goes through each vein on the shadow side of the leaf.
Look at the photo again. Notice that there are thin, dark shadows running alongside the illuminated veins. Draw these tiny shadows with sepia or another dark brown.
Lastly, I touched up the shadow side with a bit more of the darker brown watercolor.
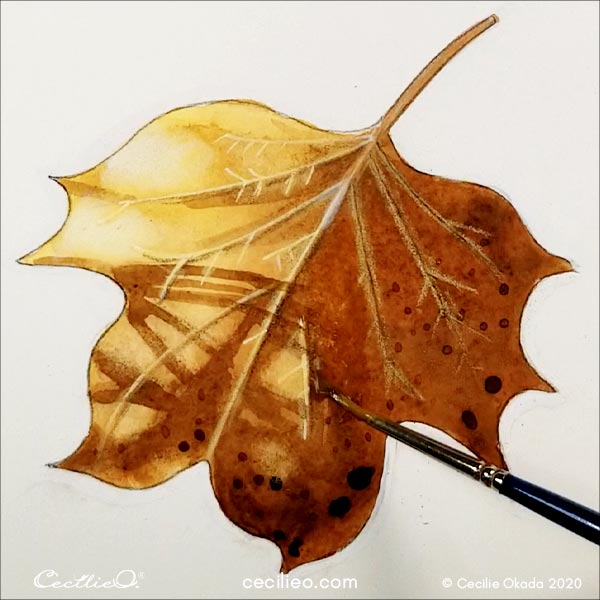
And that’s it- the leaf is now all done. Happy painting to you!
I have prepared a list of the art material you need for this tutorial: Guide to Art Supplies


