

Estimated reading time: 10 minutes
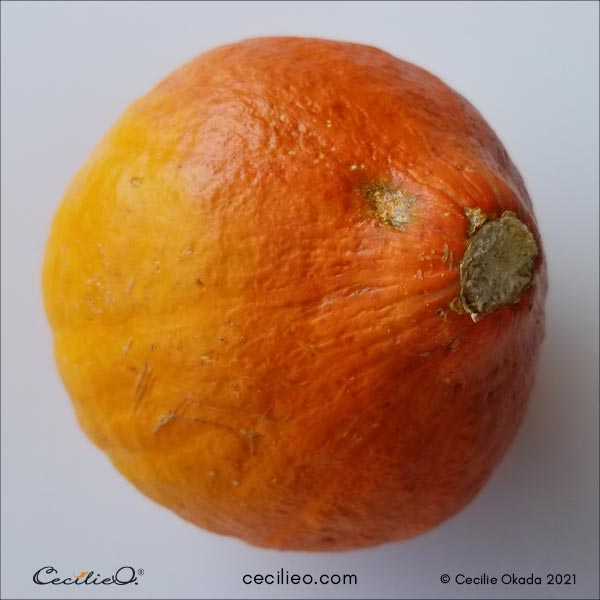
The pumpkin needs no introduction. Autumn is flooded with images of this humble vegetable. In this tutorial, you will learn how to paint a watercolor pumpkin with a simple color palette. We finish it off with colored pencils to make it look realistic.
Let’s get started.
Drawing the pumpkin and simplifying the color palette
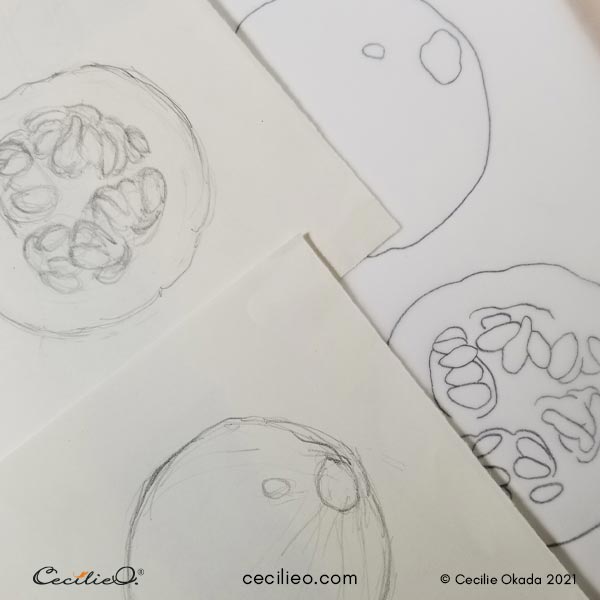
Drawing the pumpkin is not complicated. The variety I have selected has a simple round shape with a small tip. For the cut version, there is more detail to pay attention to. If you would like to trace my outline for your painting, you can download it for free in the One Tree Art Club Library. (Members: check your newsletter for access).
The reference photos look like a straightforward orange theme. But if you look closer, you will discover that there are quite a few color variations. I have picked up color swatches from the photos with our free art palette generator. These swatches show you the actual color mix.
For this painting you can use a basic palette without pre-mixing colors. They will blend as you paint.

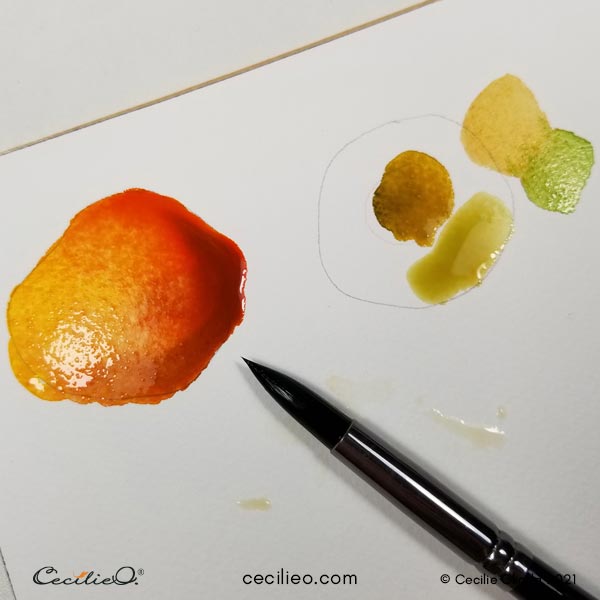
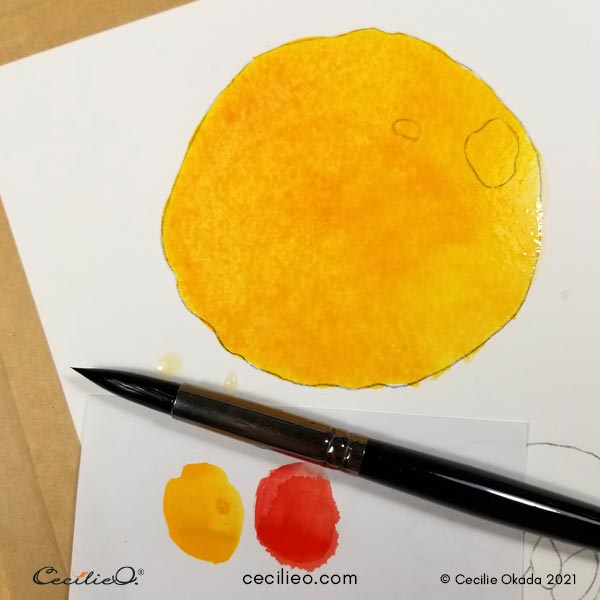
Testing out colors before starting to paint
Before you paint, it is always a good idea to do a quick test run. I used the backside of a watercolor I trashed some time ago. I find that testing on watercolor paper is best. Every painting has specific issues. Paper choice makes a big difference in how you resolve them.
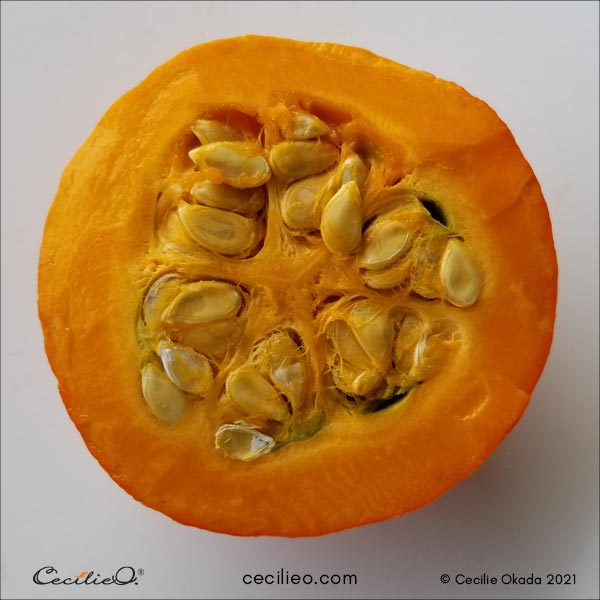
In the image below, I tested how the colors blend. The first reference photo has clear highlights and shadows. Experimenting with colors from my watercolor set, I figured out how to proceed.
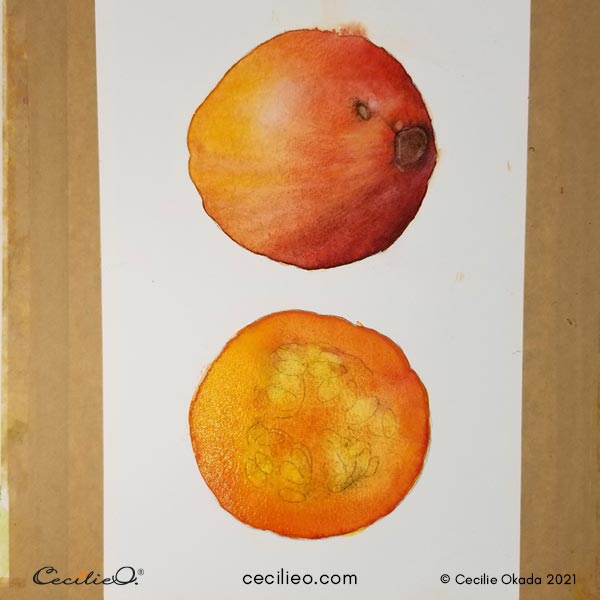
Painting the whole watercolor pumpkin
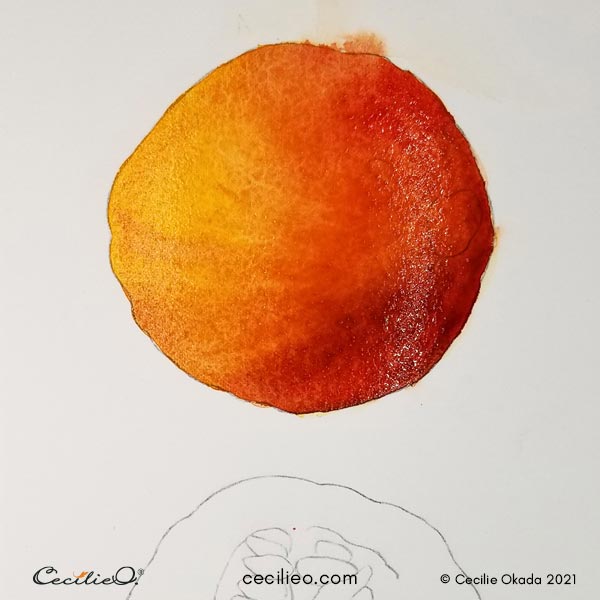
First out is a sun-yellow base. Paint with yellow, then add a tiny bit of red to skew it towards orange. Use a generous amount of water. The water will allow other colors to blend easily.
To paint the highlights and shadows, continue with shades of bright and deep red. On the darkest part, you can use brown and even a tiny bit of black. Use your brush to move colors towards the darker side. Make sure to not contaminate the light side with brown or black.
The pumpkin in the reference photo has lines that run along with the round shape. These lines are great for amplifying the 3D effect. They are accurate perspective markers.
Use a dry, pointed brush to draw in the lines. As you move the brush it will absorb water and leave bright lines.
Assessing my brush collection
I’m going to take a breather here and show you my brush collection. None are expensive real sable hair brushes, and they tend to get worn out. Leaving them to dry with clean, sharp tips, they still don’t hold up over time.

It was a pleasant surprise to get a brand new set of watercolor brushes from ZenArt Supplies in the mail. The timing couldn’t be better. The most important thing for me is that the tip of a brush stays pointed. Since I am a detail-focused type of artist, I need to paint within the borders of my outline. These brushes do a great job of it.
They also absorb water beautifully, which made drawing the lines on the pumpkin easy. The ability to absorb water allows the brush to hold more paint as well. You don’t need to dip in the punnet so often for more color.
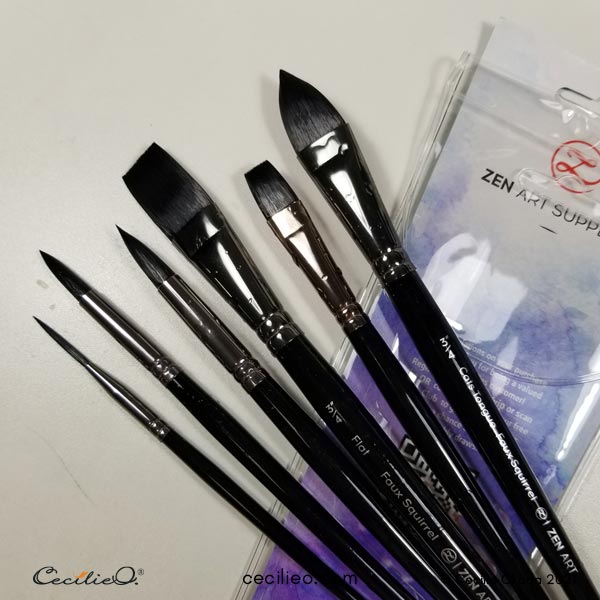
You can get the brush set here (I get a small percentage if you buy through the link). I like the eco-friendly values of ZenART Supplies and their focus on the artist community.
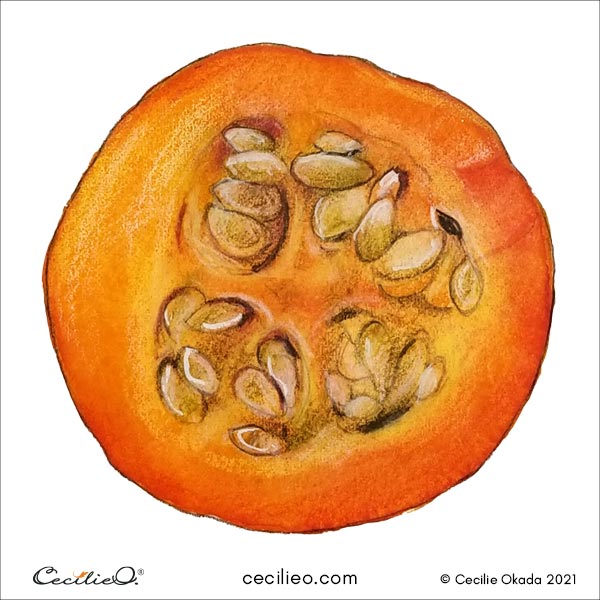
Painting the cut watercolor pumpkin
When the watercolor is dry, paint the dark tip of the not-cut pumpkin. You don’t want the brown color to bleed.
The cut pumpkin has everything from green to yellow to orange to tan in subtle, blending shades of color. Start by painting a mix of raw umber with a tad of green at the center.
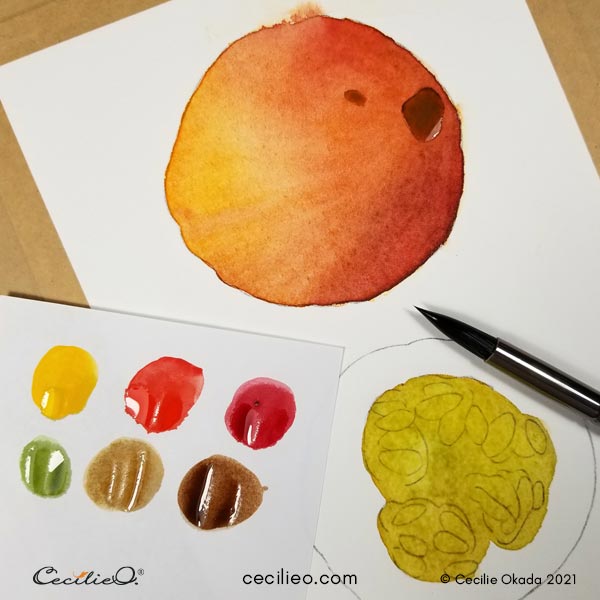
Paint the rest a sunny yellow. Let the border between the olive green and yellow blend.
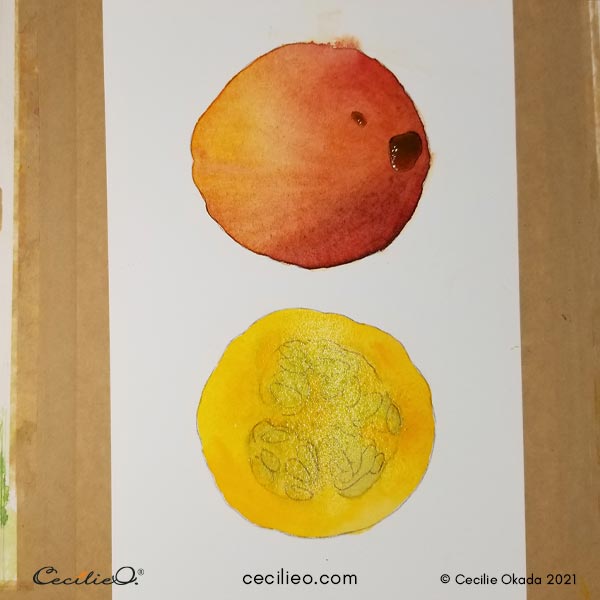
Add a tiny bit of red to the outer part to make it orange. Make sure to spread the colors unevenly. Use a sponge where the colors need to be lighter.
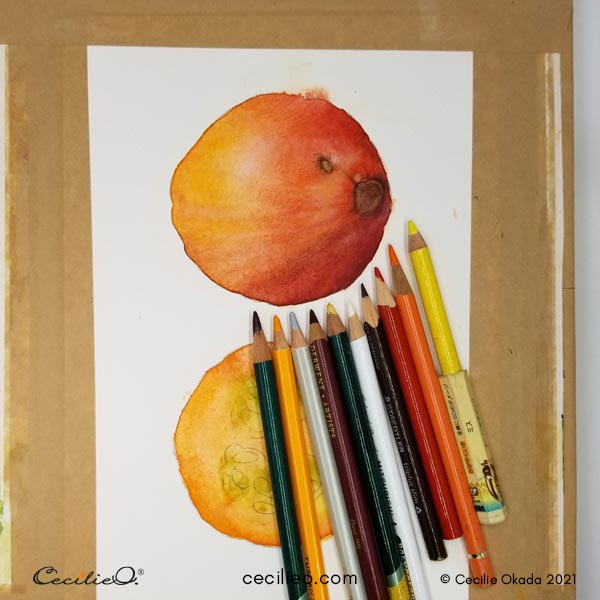
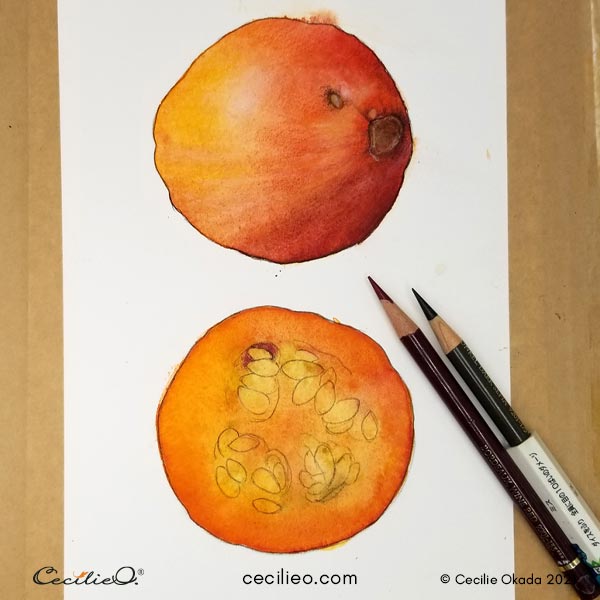
Drawing the details with colored pencils
When you draw with colored pencils on top of watercolor, make sure the paint is bone dry. Otherwise, it will be a mess. Again, I advise you to test the effects first, as you see in the image below.
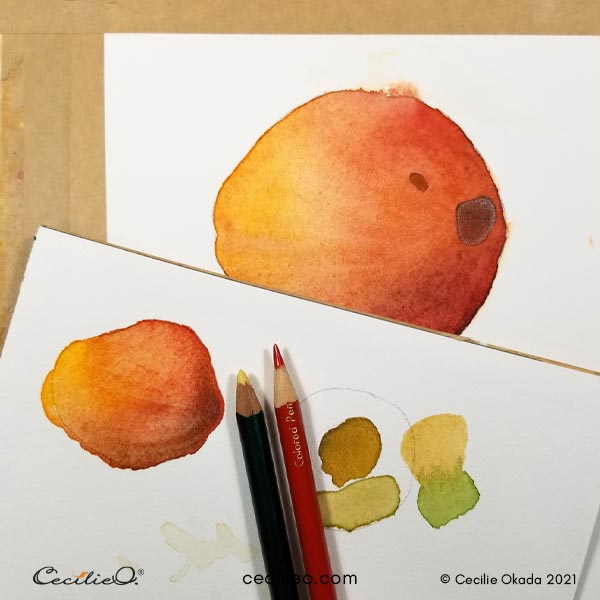
Start by completing the not-cut pumpkin. Select a range of colors from your collection. Drawing with colored pencils is not all that different from a regular pencil. The difference is that light and shadow are created with shades of color, not the pressure of your hand. But you use the same soft motion to blend the pencil marks.
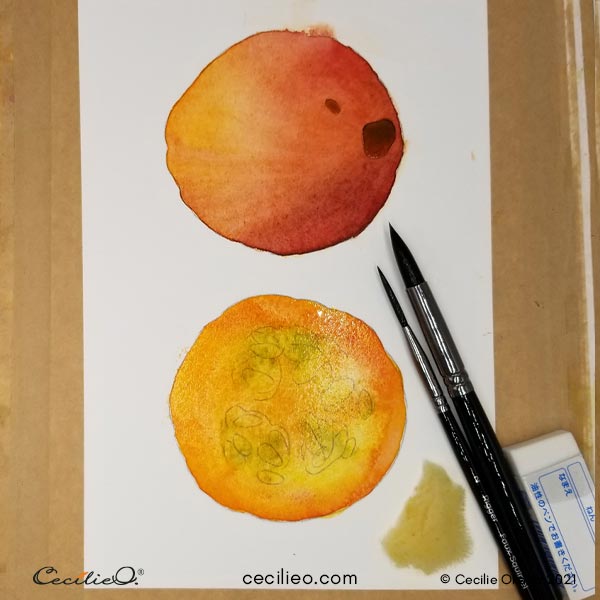
Giving the cut pumpkin a second coat of watercolor
When the cut pumpkin dried, I saw that the colors were not nearly as strong as they should be. I added a second coat of orange.

Outlining with a sharp, brown colored pencil
Wait for the paint to dry. To see the seeds and the grooves around well, redraw the outline. Re-draw the outline on the whole pumpkin too.
Work your drawing on a tilted board
Drawing at an angle is helpful for not distorting the perspective. The cheapest way is to place a board on books to get an angle.
You can see in the image below that my painting is mounted on a board. It is sitting on a tilted contraption. The contraption is meant for keeping a laptop cool (my husband got it for me many years ago). It is small, so I decided to use it for drawing instead. My desk is small and commercial tilted drawing boards are too big.
By now, my desk is usually one big mess. Creating artwork is messy.
I place my laptop on a pile of books. In that way, I can see the reference photo when I paint.

Completing the watercolor pumpkin painting
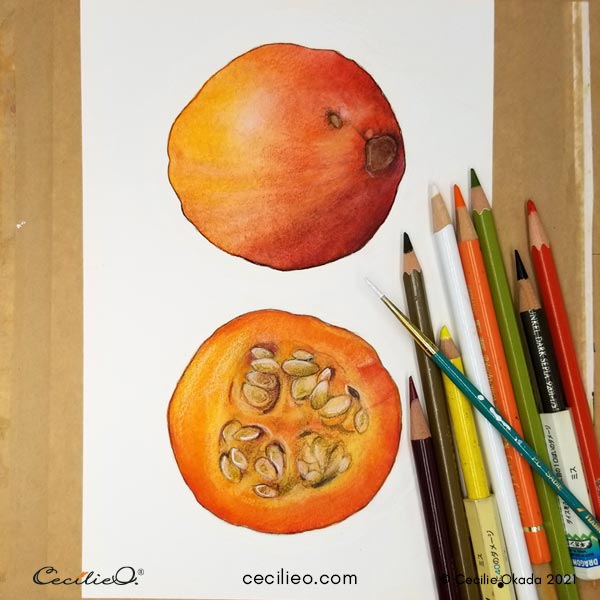
With a selection of colored pencils draw in the details of the cut pumpkin. You don’t need to use the exact same colors as in the photo. Use what you have.
Make sure to include a white pencil for extra highlights. For the seeds to stand out, add a touch of white gouache to create more contrast. There are many grooves and highlights on the cut surface. No need to be exact. Draw with light and dark colors to get a realistic look.
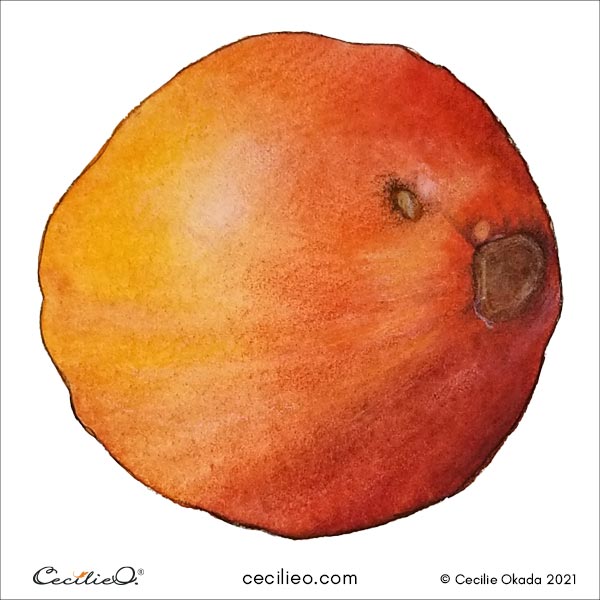
And that’s it. Happy painting!
To see the full list of art materials you need for this tutorial, check out my Art Supply Guide.


