

Estimated reading time: 7 minutes
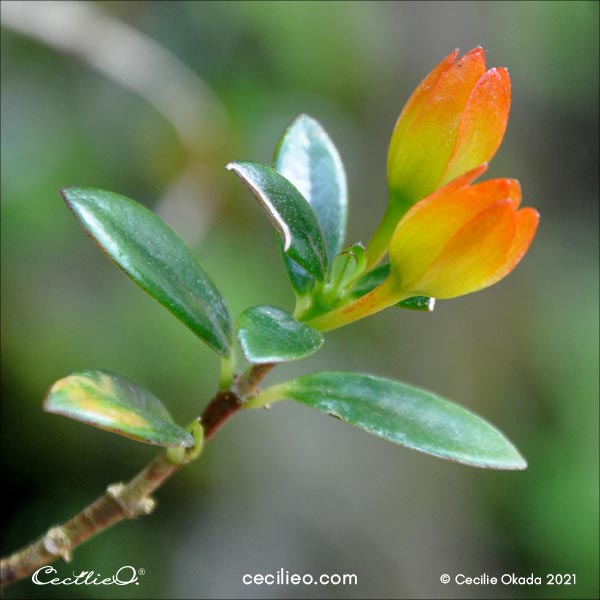
You can see half of the rainbow on the flower buds of the lovely Namatanthus flower. It is also called Goldfish plant. The gradient colors from orange to yellow to fresh green are easy to watercolor. Follow the steps in this watercolor for beginners tutorial, and you will paint a radiant flower in no time.
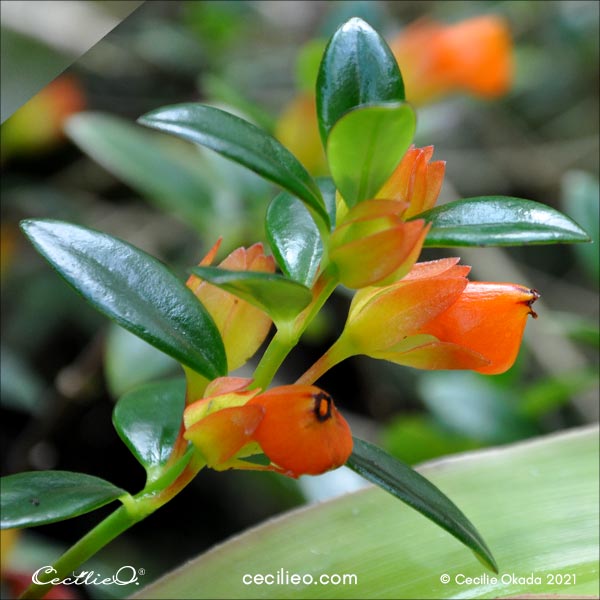
The other day, I visited Kyoto Botanical garden. It is one of my favorite hangouts. The Goldfish plant captured my attention as the sunlight illuminated the buds. Inside the glasshouse, there are all kinds of exotic plants. I include two photos here with those beautiful, fresh colors for your inspiration.
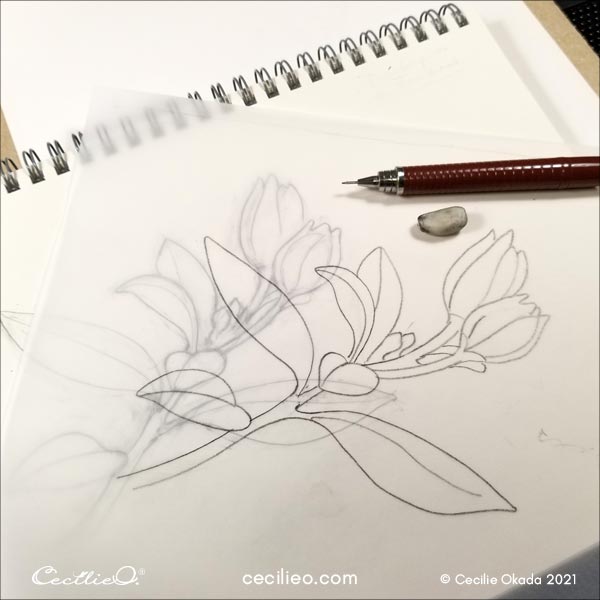
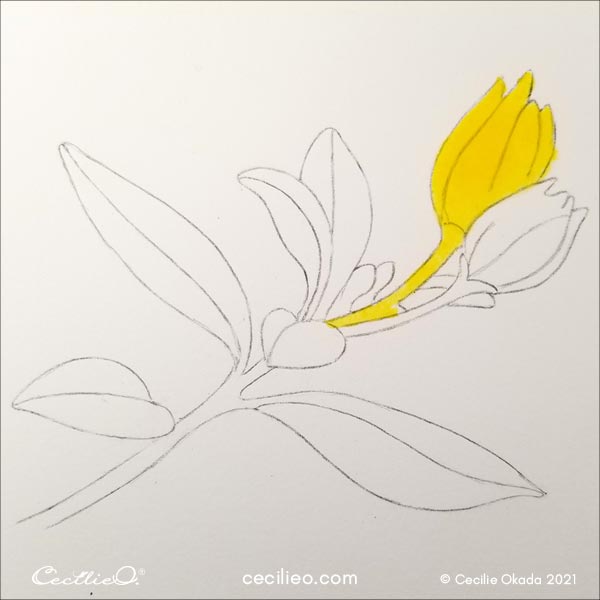
Step 1: Drawing the flower.
This flower has a rather ornamental look. Drawing the flower, I found myself in an almost decorative drawing mode. The simple outline captures the basic shape. You are welcome to download the outline for free if you are not up to drawing it yourself. Learn how to transfer the drawing onto watercolor paper.
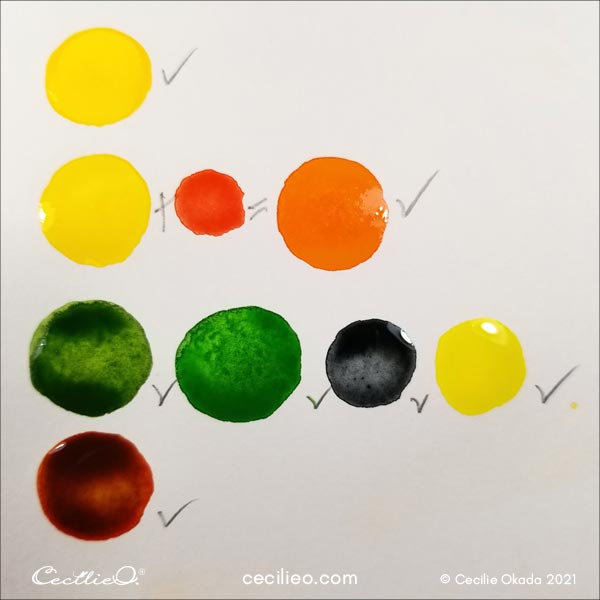
Strep 2: Settle the color palette.
There is no mystery to the colors in this flower. Mix lemon-yellow with a little bit of red, and you’ve got a bright orange. The rest of the colors can be found in most watercolor punnets.
Step 3: Watercolor the gradient colors on the left bud.
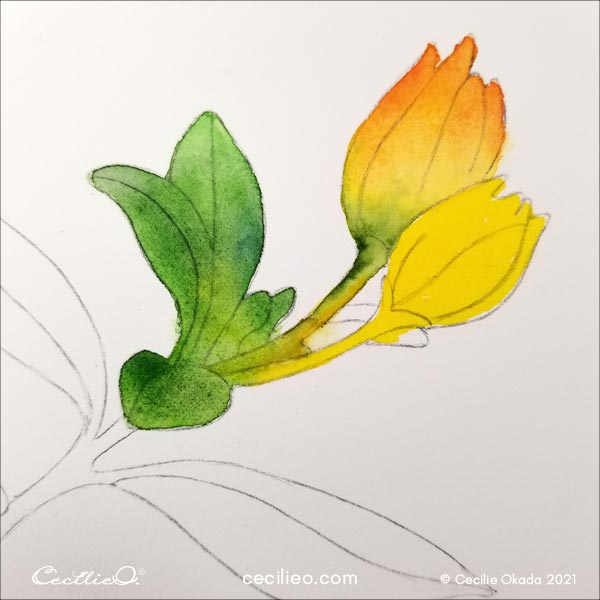
Paint the left bud and stem with plain yellow first.
While the paint is almost dry, paint the orange color in selected areas. With a moderately wet brush without any pigments on it, paint upwards. Move from the yellow at the base of the flower towards the orange with gentle brush strokes. This will make a smooth transition between the yellow and orange colors.
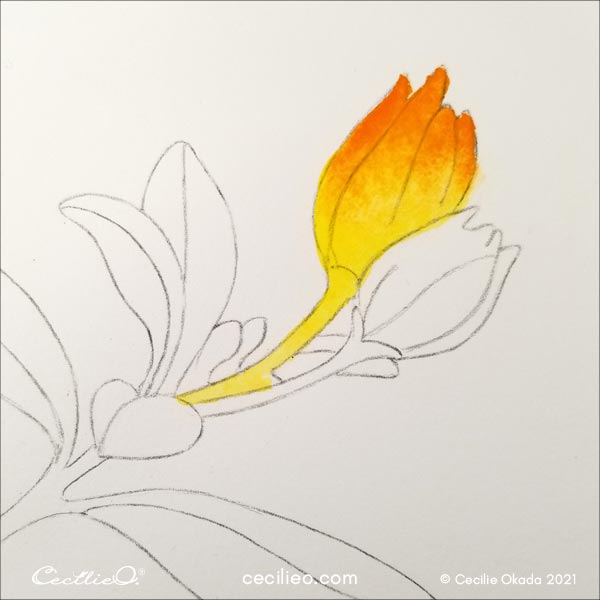
Wait for the bud to get half-dry again.
With a fine brush, paint with grass green on the stem and the bottom of the bud. Use more pigment in places where the green is darker in the photo. Add a small dash of orange to the stem. Again, use a little bit of water to smooth out the colors.
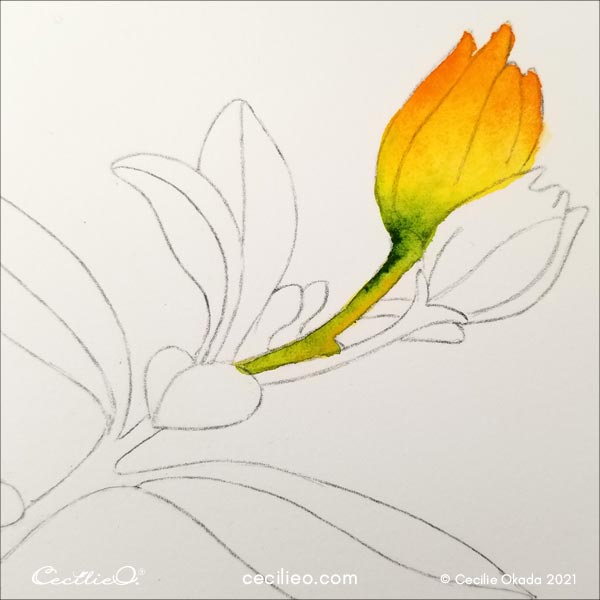
Next, do a preliminary painting of the leaves close to the buds. Use yellow to lighten up parts of the leaves.
Step 2: Watercolor the second bud and leaves.
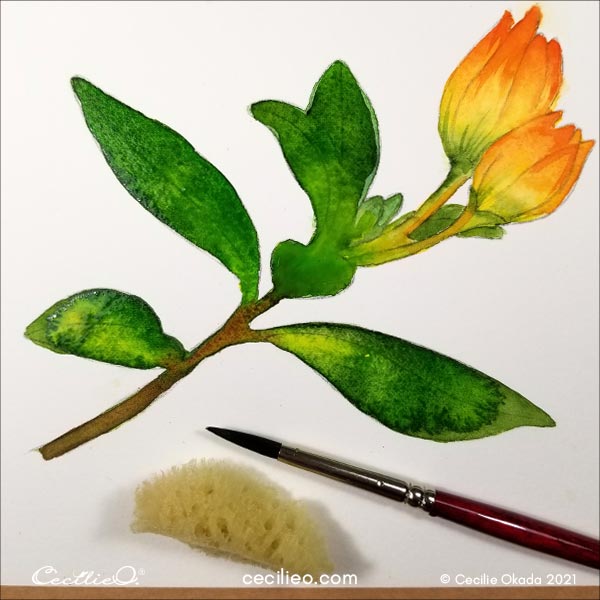
Go through the same process for the second bud. Watercolor the bud and stem yellow.
With a fresh, light green, gently add some stripes by painting upwards. Use a small amount of both pigment and water as you do this. If you have too much of either, green will bleed into the yellow in a way that you can’t control.
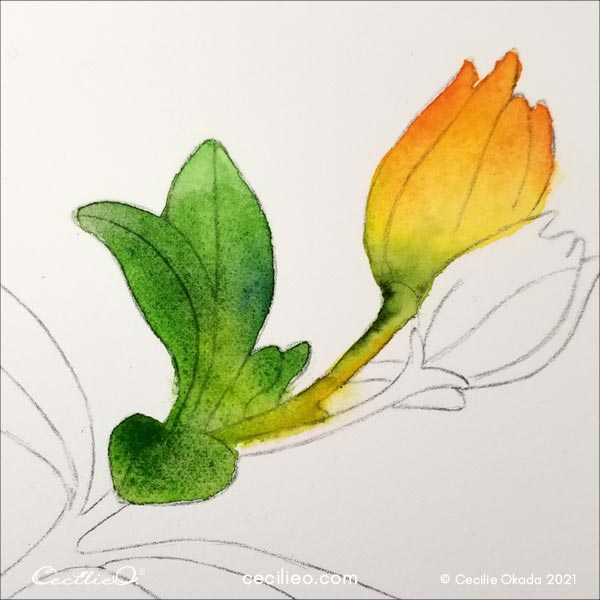
Paint all the leaves with variations of green. Some grass-green, some blue-green, and a small dash of black. Dab some lemon yellow hare and there for effect. Paint the stem with the reddish-brown watercolor.
To get the textures that you see in my painting, you need water and patience. On the right-hand leaf, the paint was quite dry when I applied some more. Using plenty of water, the pigments are distributed unevenly. For lighter areas, use a sponge.
Practice this method on a test paper first. Play around with the process.

Step 3: Light re-touch with colored pencils.
Redraw the outline with a dark brown pencil. Make sure it is sharp so that the outline does not get heavy.
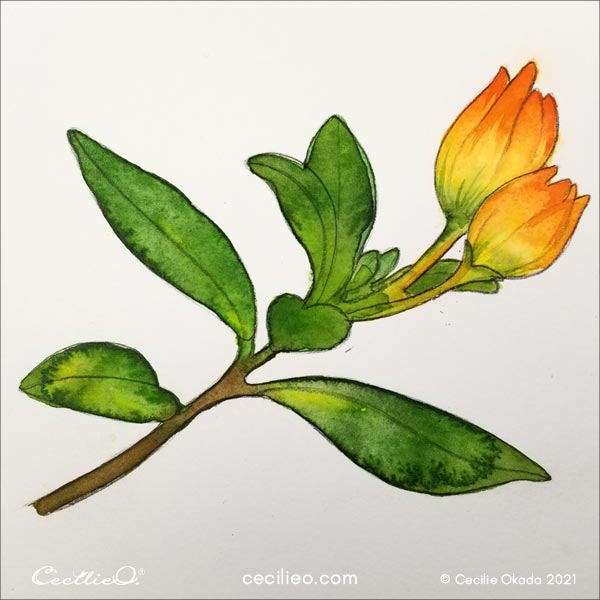
In this tutorial, we are using colored pencils to a small degree. In many of my watercolor tutorials, they play a more important role in adding details.
On the buds, use a dark orange pencil to highlight the top edges of the buds. Look at the reference photo. Use green colored pencils from very light to dark to highlight textures.
The leaves of the Goldfish plant are thick and waxy. I have created some highlights with white pencils to emulate the gloss on the leaves. Yet, I decided to leave it be with the sharp highlights. This watercolor is doing well without.

Step 4: Completion.
As one last thing, draw a little bit of white on the petals. It will create some luminosity. And now, this watercolor for beginners tutorial is complete. My best wishes for your flower watercolor!

If you need advice on selecting art materials for this tutorial, my Art Supplies Guide will be helpful.
A selection of more watercolor tutorials on my blog:


