

Estimated reading time: 9 minutes
My website has a tool that helps you find great reference photos for sketching and painting. The other day, I wanted to practice sketching seascapes. Lo and behold, I stumbled upon a beautiful, dramatic photo that looks almost like a painting. That’s what inspired this tutorial on how to watercolor waves.
Looking at the frothy waves, I thought, “Yeah, I can do that with my sponge and white gouache.”. Follow this step-by-step tutorial, and you too can watercolor a fresh and breathtaking seascape. When you add colored pencils for details, the project becomes an easy one. There is no need to master intricate techniques for painting water with watercolor.
Step 1: Assessing the reference photo.
The contrast between the turquoise sky and the dotted clouds is striking. The frothy waves look very much like the clouds, and this makes the photo so unique. The rocks have a gorgeous dark brown base color with tints of different brown hues. The unruly ocean is a much darker blue than the sky.

At first, I used the auto color picker to see the range of colors in the photo. Noting that the hint of green was missing, I used the manual color picker. This way, I could select the color palette myself.


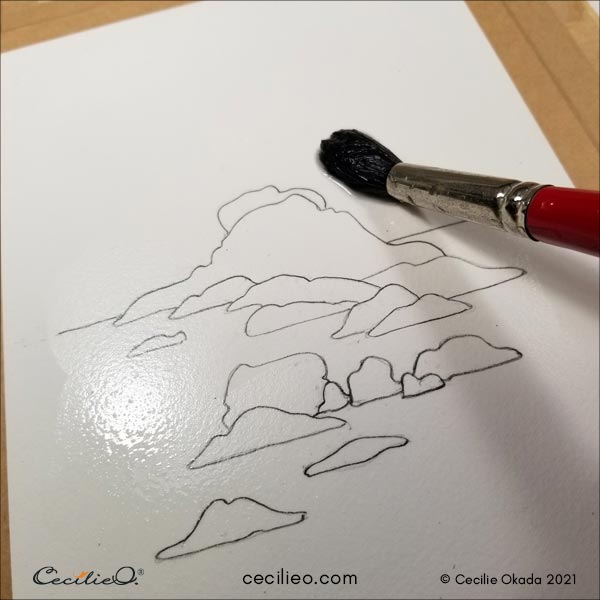
Step 2: Outlining the rocks and the horizon.
Rocks come in many shapes and sizes. There is no need to get angles and proportions right. Unlike plants and animals, a line out of place will not make the rocks look wrong. I outlined directly onto my watercolor paper. You can download my drawing in the free One Tree Art Club Library. Learn how to transfer the outline to watercolor paper.
Step 3: Painting the sky and sea with watercolor.
You can paint brown on top of blue without any color distortions. For this reason, you can start by painting the entire scene with turquoise watercolor. Paint with water first to make the color flow easily.

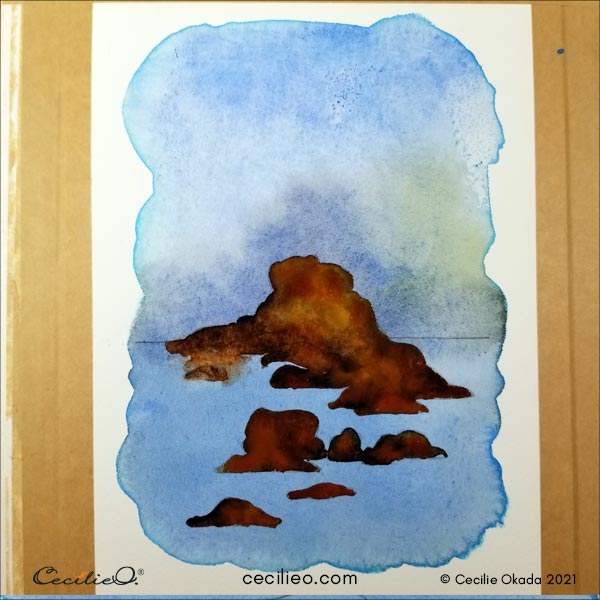
Next, paint the ocean a darker blue. The waves a still darker blue. Let the colors blend, nothing needs to be exact at this stage. Add a dash of green and black on the right side of the wave. On the sky, paint the top part with a light blue to slowly blend with the turquoise.

Below, the watercolors have dried. The marks to the right on the sky happened because of a tissue paper box that sat on top of the painting by mistake. Oh no!…but it made a nice effect, so no worries. Sometimes my desk is a bit too messy.

Step 4: Painting the rocks with watercolor.
On the dry, blue color, paint the rocks with a few different kinds of brown. Some black too for shadows. Enjoy moving the colors around, dabbing new types of brown into the mix. Use a sponge or tissue paper to soak up some for highlights.

Follow the same process for the remaining rocks.
Step 5: Shadows and highlights.
Redraw the outline with a sharp, brown pencil.

Gently draw some shadows and highlights with colored pencils. You will add some more later.

Paint parts of the ocean with a darker blue, including arbitrary waves.

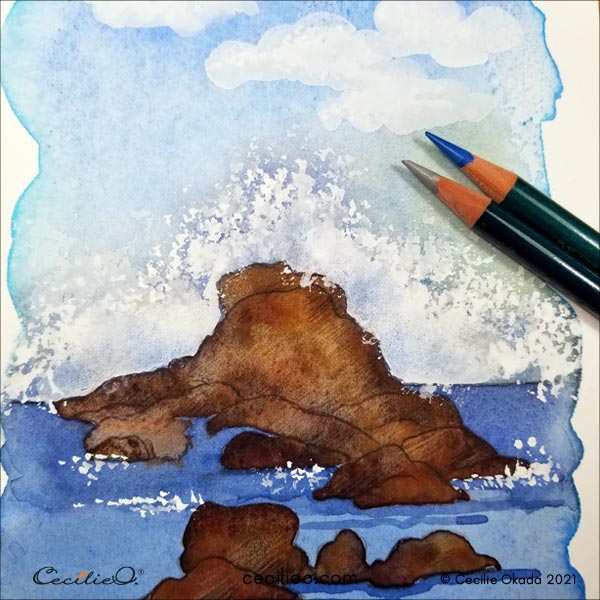
Step 6: Paint frothy watercolor waves and clouds with white gouache.
Squeeze some white gouache out from the tube. Don’t add any water. With a natural watercolor sponge, tap the white paint. Then, with a very light touch, tap the sponge on the area of the frothy waves. That will transfer the sponge texture, which is similar to the frothing waves. (Affiliate links to the sponge and gouache, meaning, at no cost to you, I will earn a small commission if you purchase through the link.)
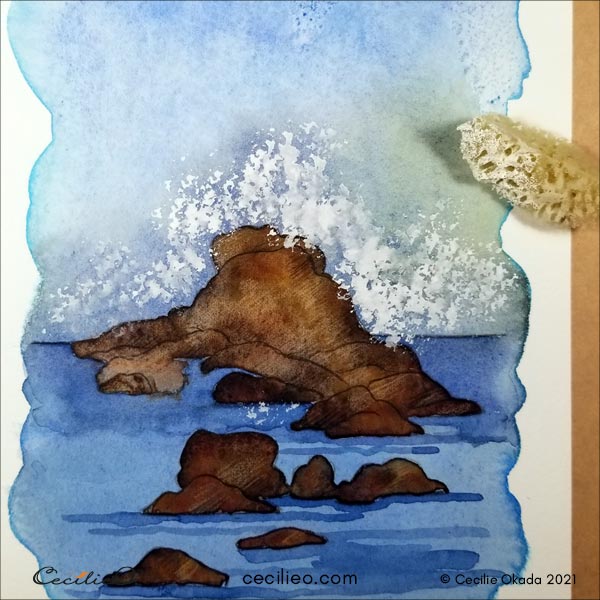
Fill in the gaps by painting the waves with the white gouache, leaving the outer edges as the water spray. For this, you need to have water on your brush. Paint some white clouds.
Step 6: Draw texture and depth with colored pencils.
With a blue and a grey colored pencil, draw shadows in the waves.
Draw the grey shadows under the clouds.
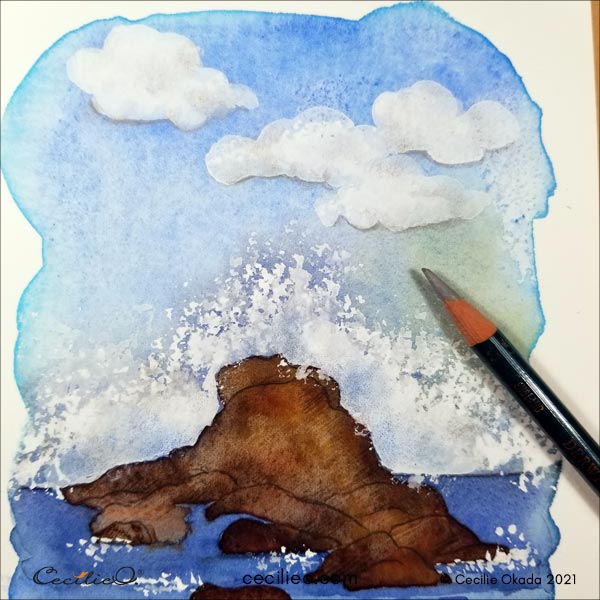
With turquoise and light yellow colored pencils, freshen up the colors in the sky.
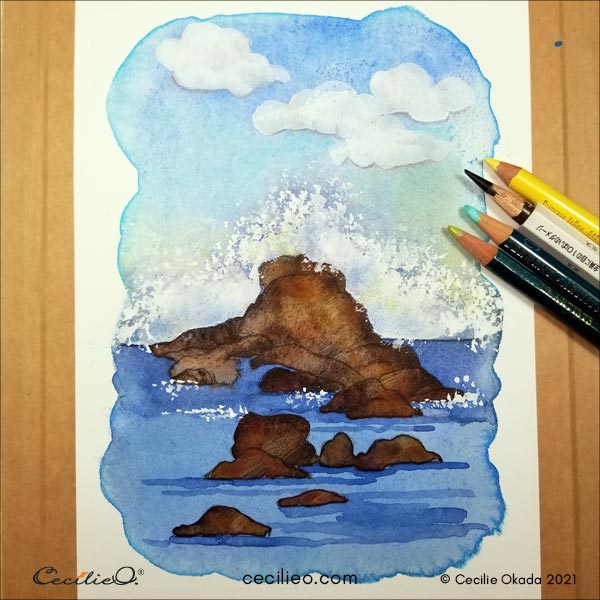

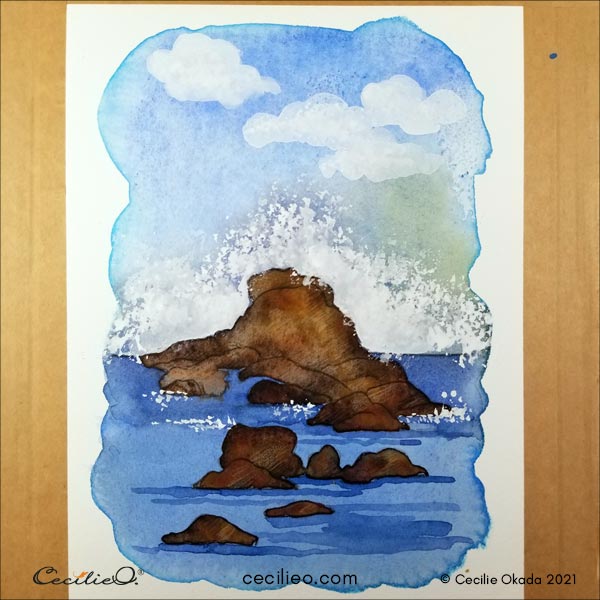
Step 7: Finishing up the watercolor waves.
Paint some white waves as lines. Create some more fine froth by using the sponge with an even gentler touch. By doing this, you will get tiny dots of white sea spray. It’s a good idea to practice with the sponge on a test paper first. Make sure the blue underpainting is dry on the test paper before you practice.
You can see that at this stage, it’s a matter of using your colored pencils creatively. Detailed instructions can only go so far. There comes a time in the process where your creativity takes over. Play around with colors to highlight certain areas of your painting. Use different brushes for the white effects. I used a flat brush to paint the bottom right part.
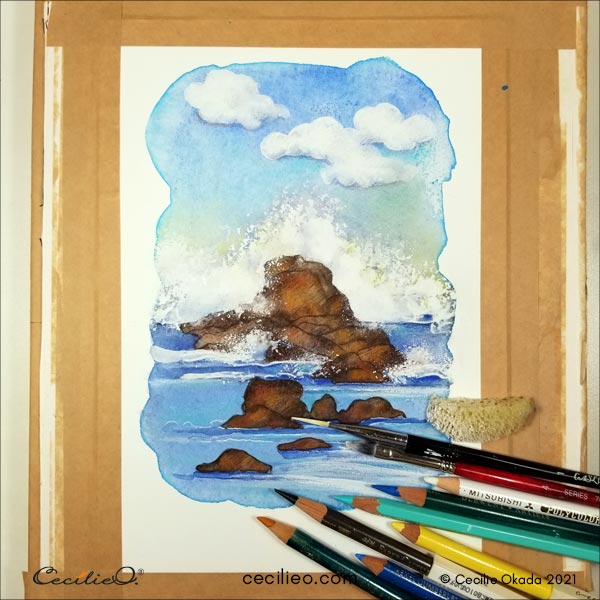
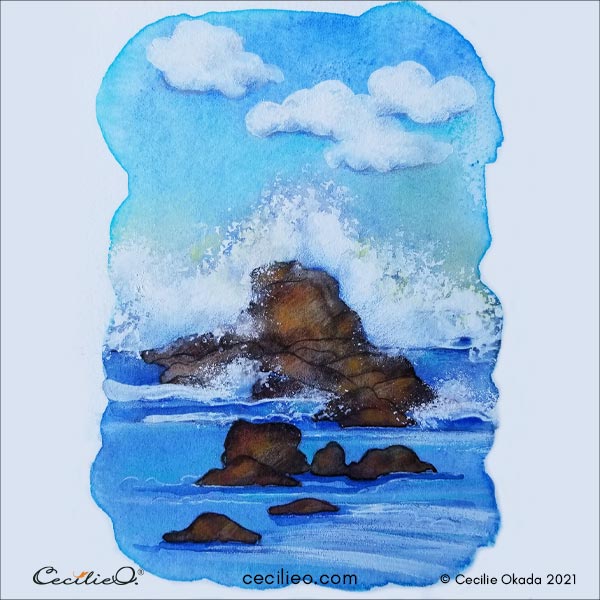
I came back the next day to complete my painting. In the first round of this watercolor, I was not at all happy with the result. But looking at it with fresh eyes, I saw a path to improvement.
So here it is, my frothy watercolor waves in a dramatic seascape. My best wishes for your painting!
If you wonder about the art materials needed for this tutorial, my Guide to Art Supplies should be helpful.
More watercolor & colored pencils tutorials on my blog:


