Estimated reading time: 6 minutes
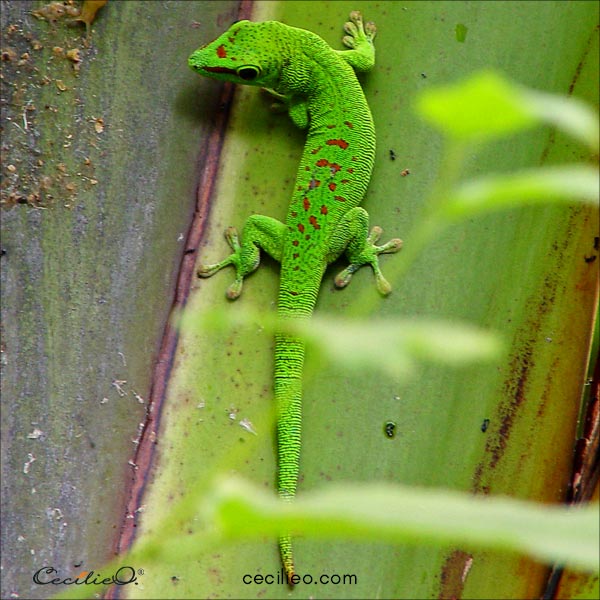
The classic image of a gecko in motion is like an open invitation to artists. With its exquisite curves and beautiful colors, the playful gecko is teasing you to have a go at painting it. There are many amazing, free photos of geckos online. For this easy watercolor painting tutorial, I opted for a photo with limited details. The reason is that it will help us to keep it simple. Five steps only.
Gecko symbolism
If you are looking for a symbol of good luck, the gecko is your animal. As guardians of the home, they protect from negativity and bring good fortune. This is true in many cultures.
Cut the tail of a gecko and it will grow back fresh and fine. Regeneration and renewal are potent symbols of the gecko. It stands for overcoming obstacles and blossoming into something new. If there is an illness in the home, a visiting gecko will restore health.
So, let the good-luck gecko inspire your watercolor!

Drawing the gecko
Drawing the gecko is fun and easy. If you rather not and want to just watercolor, you are welcome to download my drawing for free. It is available in the One Tree Art Club library. (members: check your newsletter for access details). You can trace and transfer the outline to watercolor paper.

Preparing your colors
It always pays to mix the colors for your painting in advance. In that way, you can avoid muddy colors and other mistakes. The more you decide in advance, the easier it is to paint. Some may argue that it takes away from spontaneous creativity. I say, no, not at all. The better prepared, the more freedom to experiment.
The colors for this painting are few and easy to assemble.

Step 1: Painting the apple green foundation color
Paint the entire figure with plain water first. Then, paint it with apple green watercolor. Make sure to add more pigments at the center of the body, running from the head and downwards. The water will help to distribute the color with smooth transitions.

Step 2: Adding ochre watercolor
Add more green color as you see fit. For the hands, feet, and tip of the tail, paint with ochre. Let the ochre color also run softly along the sides and bleed into the green. Use more pigment in the extremities and less on the main body.

Step 3: Paint shadows with a dark green
While the paint is still moist, paint the shadows with the darker green. By moist I mean humid enough for the color to bleed but dry enough to bleed just a little. Use the tip of your brush to create delicate transitions of color.

Step 4: Add the red spots
Look at the reference photo when you paint the red spots. They don’t need to be at exactly the same place. Paint them in the same general area but feel free to play. No two lizards are alike. Your painting will certainly not be, neither.


Step 5: A touch of colored pencils and a splash of bright red
Wait for the painting to dry. Draw a thin outline with a sharp brown colored pencil. Keep sharpening as you draw to keep the line thin. If you are confident with a fineliner (ink), then use that. I prefer a sepia-colored pencil because I can erase mistakes. And believe me, I make plenty of mistakes. I envy those who comfortably draw outlines with ink.
The dark red spots are now ripe for a brush-up with bright red paint. The underlying dark red spots create a sort of outline for the bright red. That makes them look more like the spots in the photo.

You can continue drawing more details with colored pencils, but I think the gecko looks just fine without too.

An easy watercolor painting is completed
And that’s it. Have fun with the gecko! If you wonder about art materials needed for this tutorial, check out my Guide to Art Supplies.
And don’t forget- if you are keen to learn how to draw flowers, my book “How to Draw Flowers Step by Step. 46 Easy Designs” will help you out.
Some more tutorials that you may like:


