

Estimated reading time: 6 minutes
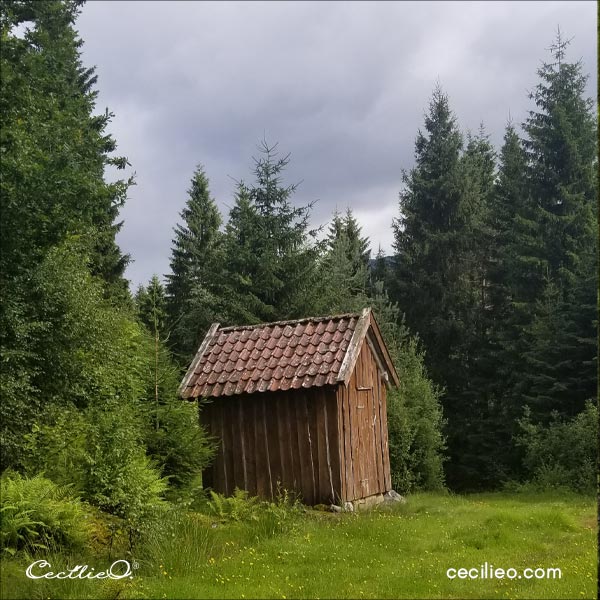
A simple process will do to watercolor pine trees. You will get the hang of it with a little bit of practice. An old shed at the edge of the wood inspired this tutorial. The landscape also provides an opportunity to play with composition.
The Norwegian Wood
The reference photo is of a deep, dark Norwegian forest. It’s from a hike up in the hills above a sheep farm. The ground was wet with bogs and wildflowers in abundance. Wonderful summer memories galvanized this watercolor tutorial.
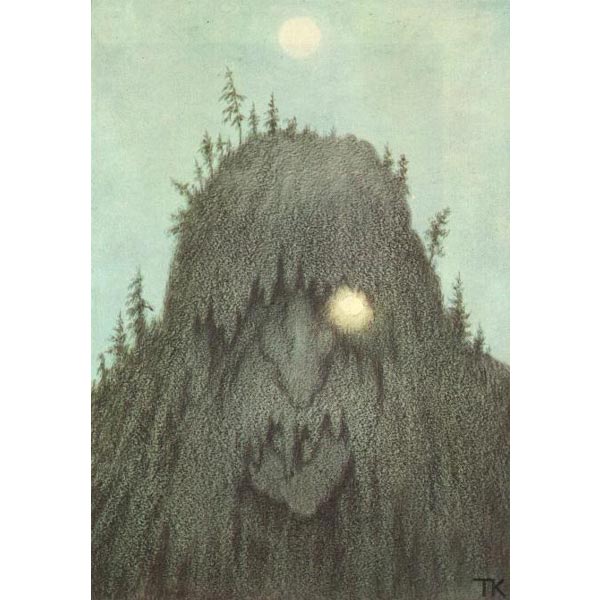
Norwegian folklore is full of old tales about trolls who roam the deep forest after dark and live in mountain caves during the day. The renowned artist Theodor Kittelsen created magical illustrations with trolls and misty forests. He illustrated the whole gamut of Norwegian mythical creatures.
Let’s get on with our watercolor.
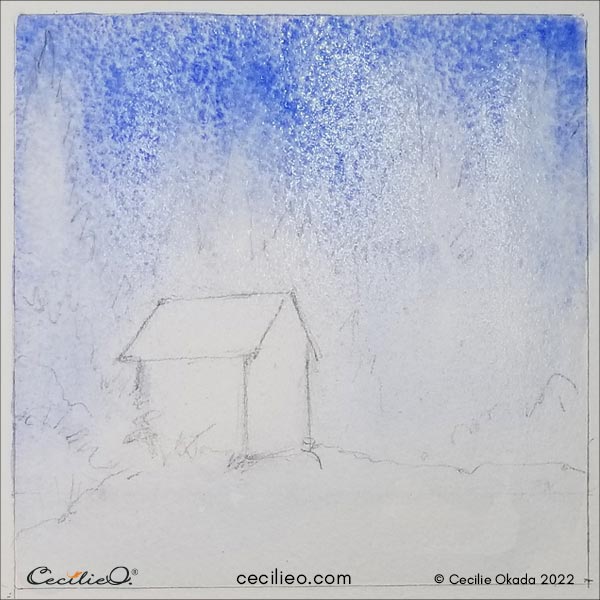
Step 1: Watercolor the sky
After outlining the landscape, paint the sky blue. Avoid painting around the trees by painting the whole square blue. Let the blue dissolve gradually below the tree line. Use water and a sponge to facilitate a smooth gradient.
Many of my watercolor tutorials have a free outline that you can download from One Tree Art Club. Learn how to trace and transfer to watercolor paper.
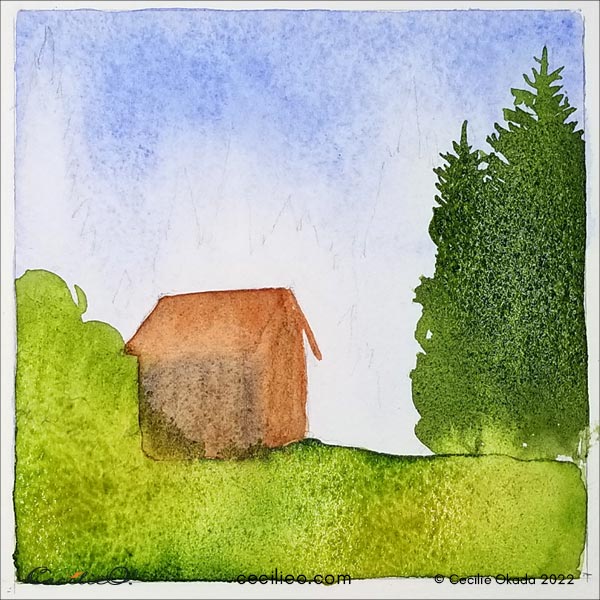
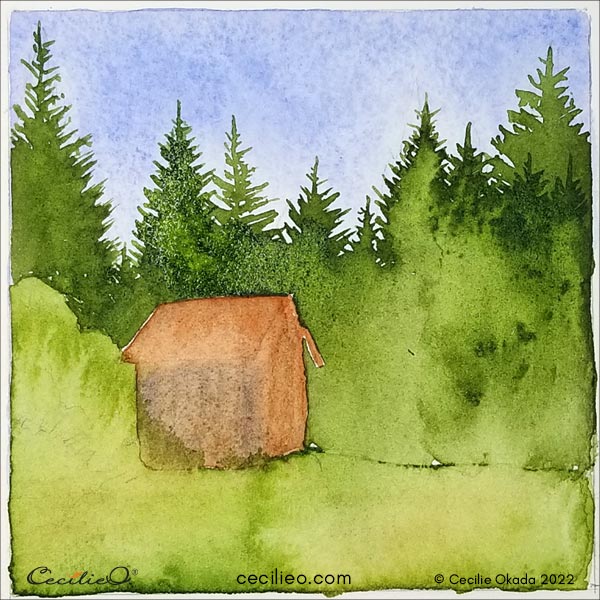
Step 2: Paint the shed and meadow
When the blue watercolor is dry, paint the shed with two kinds of brown.

Use at least two kinds of green for the meadow. Whatever you have in your punnets will do. Add some ochre and yellow as well. The point here is to avoid a flat green color since the meadow is full of various colors. Look closely at the photo, and you will be amazed at the colorful richness of the pasture.

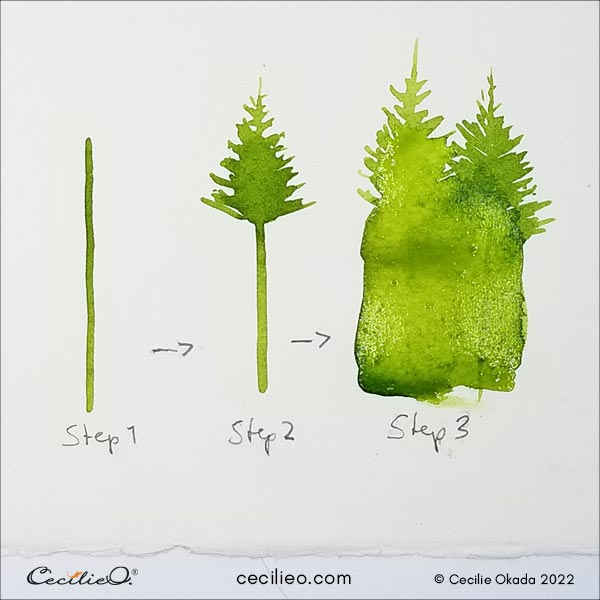
Step 3: How to watercolor the pine forest
As you can see below, I have painted only the top part of the pine trees with a distinct form. Here is how you paint the pines:
- Use a pretty wet and sharply pointed brush, and paint a straight, vertical line.
- Starting at the top, paint uneven horizontal lines that stick out from the center line. Each tree branch is longer than the one above.
- To paint the uneven branches, use a moderately wet brush. Paint in a free and loose way. Take cues from the photo, but paint without looking at it.
- The first two trees have merged into each other. Fill in the body below with wet paint. Let the paint flow into the still-wet meadow below.
Now that you have painted the first two trees, keep going and finish the rest.
Add a dash of black to darken the flowing body of paint on the lower part of the forest. As the paint slowly dries, it forms patterns. Extend the random shapes with more pine trees before the paint is dry.
To get this effect, use plenty of water for the body. The pigments will separate into random patterns when it dries.
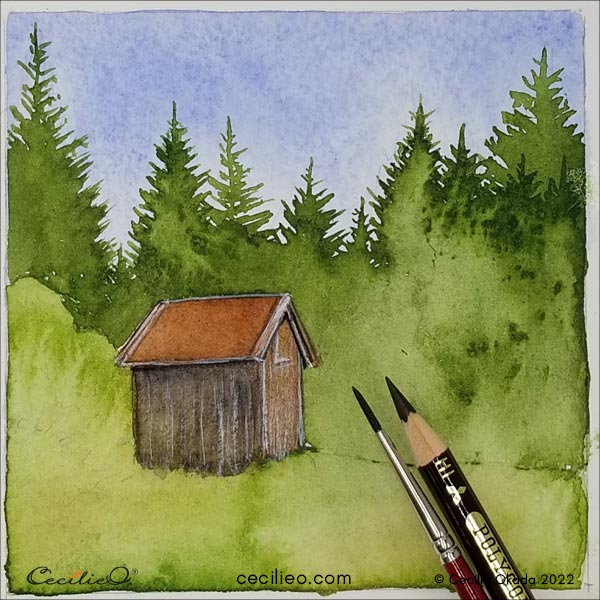
Step 4: Watercolor a realistic shed
Redraw the outline of the shed with a dark brown colored pencil. Paint another layer of brown colors. Use black for the shadow while the brown is still wet.

When the brown watercolor is dry, paint white lines with white gauche. For the boards, use a dry brush to make them look scruffy. For the crisp white lines, use a moderately wet, pointed brush.
Enhance the shadows with a dark brown colored pencil.
Step 5: Watercolor bushes and the meadow
Behind the shed, some bushes and grass are sticking out. Bushes look more convincing if you add some dots at the borders. Use a few greens and some yellow.
When you paint the meadow, play with ochre, yellow, white, and whatever colors you fancy. The challenge here is to balance your painting into a cohesive whole.


Last details
You don’t need to fiddle with your painting and add more details. I was not satisfied with mine, so I painted stones in front of the shed and added dots of yellow flowers. The yellow flowers look lovely in the photo. To finish off, I used colored pencils to spice up here and there.

And that is how you watercolor a pine tree forest and an old, dilapidated shed.
For a list of art materials for this tutorial, go to Guide to Art Supplies.
More tutorials:


